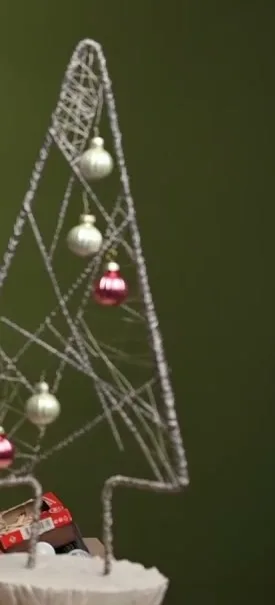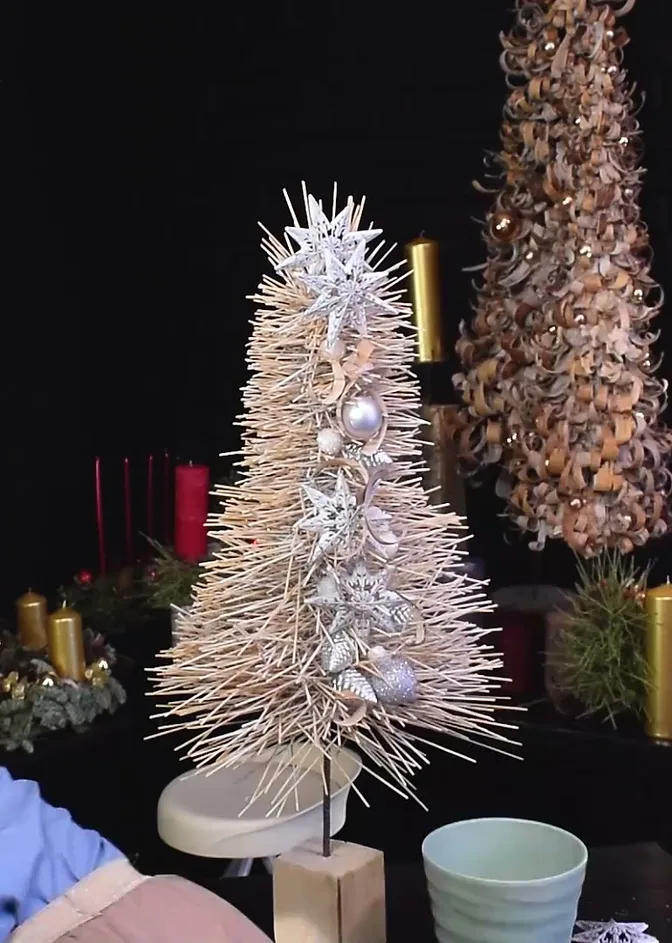
A metal wire Christmas tree can take two quite different forms: a full tree built around a central rod and filled with rattan sticks, or an open outline with crosspieces set into a plaster base. Choose the silhouette first. The full version gets its texture from the projecting sticks; the open version keeps the wire itself on view, with small ornaments suspended between the lines.
Dense rattan texture beside an open wire framework.
These are sculptural tabletop projects without greenery. For a wider look at the shapes you could make, see the tabletop Christmas tree guide.
Choose the structure before the decorations
Decision | Wire and rattan tree | Open wire tree |
|---|---|---|
What you see | A tapering mass of projecting sticks | An outline divided by crossing lines |
Main support | A metal rod in a wooden block | Wire bundles set into a cast plaster base |
Role of fine wire | Loose loops hold the rattan | Wrapping joins the parts and fills selected sections |
Ornament placement | A vertical line along one side | Small ornaments hung inside individual openings |
The rattan version has an inner framework that gradually disappears into the texture. On the open tree, the wrapping remains part of the finished design. Check the joins and the spacing between crosspieces before adding ornaments.
Make the wire and rattan tree

For this construction, gather a wooden block, a metal rod, stiff wire for the ribs and flexible wire on a spool for the filling. You will also need rattan sticks, white spray paint and decorations such as stars, small baubles, pinecones and birch bark. The tools used are a drill with a bit matched to the rod, wire cutters, pruning shears and a hot glue gun.
For a concrete starting example, this construction uses a wooden block measuring 10 × 10 × 10 cm and an 8 mm rod, with an 8 mm drill bit. The rib wire is 1.2 mm thick. Lower rib pieces are about 35 cm long, decreasing to about 4 cm near the top. These are dimensions for this particular framework, not a formula for the finished height of every tree.
Build a tapering framework
Drill a hole in the block and set the rod upright. Attach the wire ribs to the rod by winding them around it. Use longer ribs near the bottom and progressively shorter ones toward the top. Check each attachment before covering it: a rib that turns freely around the rod needs to be secured.
As you work upward, compare the broad lower ribs with the short ones at the tip. Their lengths establish the taper.
Add loose wire loops
Twist the flexible spool wire into loose, three-dimensional loops. Make several sections, attach them to the central framework and interweave them. Turn the ends of the ribs inward into hooks that help support the looped filling.
Keep space inside the loops. The next stage relies on passing rattan sticks through this loose network, so compressing it into a flat pad would change how the filling works.
Thread in the rattan
Sort the sticks before you start. Use longer pieces at the bottom and shorter ones near the top. Working upward from the base, push the rattan through the wire loops. The loops grip the sticks at the points where they pass through the filling.
At the tip, insert the short pieces more closely together without pushing them all the way through. Trim the top with pruning shears to bring the outline together. The lower sticks can remain more expansive while the top narrows to a defined point.
Finish with a vertical line of ornaments
Paint the inner wire white to bring it into the pale texture of the tree. Follow the spray paint manufacturer's directions for use.
Attach stars, baubles, pinecones and pieces of birch bark with hot glue along one side. Arrange them in a vertical line that carries the eye toward the tip. Repeating stars at different heights gives this line a rhythm while leaving the surrounding rattan visible.
Make an open wire Christmas tree

This version uses stiff wire, fine crinkled decorative wire, casting plaster and a small planter as a mold. The crinkled wire wraps the structural bundles, binds the joins and fills selected openings. You will also need plastic film for lining the mold, wire cutters, pliers, small glass ornaments, primer and cork for the underside of the base.
In this example, each of the two supports is a bundle of ten wires, each 1.2 mm thick. Additional bundles extend the outline upward, while paired wires form the crosspieces. The total wire requirement depends on the chosen outline and internal pattern.
Cast the base around the supports
Bundle the structural wires into two upright supports and wrap them with decorative wire. Leave the lower ends unwrapped. Spread some of these ends sideways and bend others back into hooks so they can sit inside the plaster.
Line the planter with plastic film; the planter is a mold for the base. Mix and use your chosen plaster according to its instructions, then pour it into the mold. As the plaster thickens enough to hold the supports, position them upright. Judge removal by the casting and the product directions. A setting time from one small cast is not a reliable schedule for every plaster or mold.
Extend the outline and join the tip
Add more wire bundles to extend the supports upward, wrapping the overlaps with the decorative wire. Stagger individual wire ends along the join so they do not all stop at one bulky step.
Use pliers to bend the upper parts toward each other and form the tip. Trim any ends that obstruct the bend, join the sides and wrap the top to match the density of the sides. Pause here to look at the outline. Its shape will stay visible in the finished tree.
Fit the crosspieces individually
Bend the sides slightly forward to introduce depth. Make crosspieces from paired wires wrapped in the decorative wire, measuring each against its intended position. Their lengths vary with the spaces they bridge.
Bind the crosspieces to the outline with crossed wraps at two or more attachment points, then twist the binding ends together. Trim and tuck the ends. Spread the intersections through the tree rather than bringing all the lines into one central knot.
Fill selected spaces and hang the baubles
Wrap decorative wire across some sections and leave neighboring sections open. This creates a visible difference between fine, denser areas and the clear spaces around them. When the spool no longer fits through an opening, work with cut lengths.
Tie a small length of decorative wire to each bauble's hanger, then secure it to a crosspiece. If the binding slides along the crosspiece, add another turn at that position. Finish the plaster base with primer and cork beneath it.
Keep the wirework visible
Before adding more ornaments, look at what already makes the tree distinctive. The rattan tree has a dense surface of projecting sticks and a clear vertical decoration line. The open frame has an exposed outline, changing intersections and a few filled sections. Leave enough space around the ornaments to keep those differences visible.
Turn the tree around and inspect the joins. Tighten a loose rib or crosspiece before placing it, and trim or tuck projecting wire ends. Check that the rattan still narrows toward the top and that the open frame's outline is readable behind its ornaments.
Set the tree in its intended spot and step back to the distance from which you will usually see it. If you would prefer a softer, covered surface, compare the moss tree with dried oranges. For a branching green silhouette, see the greenery Christmas tree in a pot.