A tabletop Christmas tree can be a dense cone of greenery, a triangle framed in fir, or an open wire sculpture. For a larger space, a tall tree with a twig-wrapped tip or a spreading branch structure offers a different presence. Choose the spot before the decorations: the base, lower branches, and viewing angle will do more to determine whether a tree fits than its ornaments.
These eight projects from our Christmas collection show how much the same triangular shape can change with its materials. Compare their supports, surfaces, and construction to find a tree you would enjoy making for your own space.
Compare the shape before choosing the materials
A tree against a wall needs a clear front. A tree on a table that people walk around needs sides worth seeing. For a large tree, leave room for the lower branches as well as the support beneath them. A small wooden base does not describe the width of a spreading tree.
Project | Shape and surface | Support | What the choice involves |
|---|---|---|---|
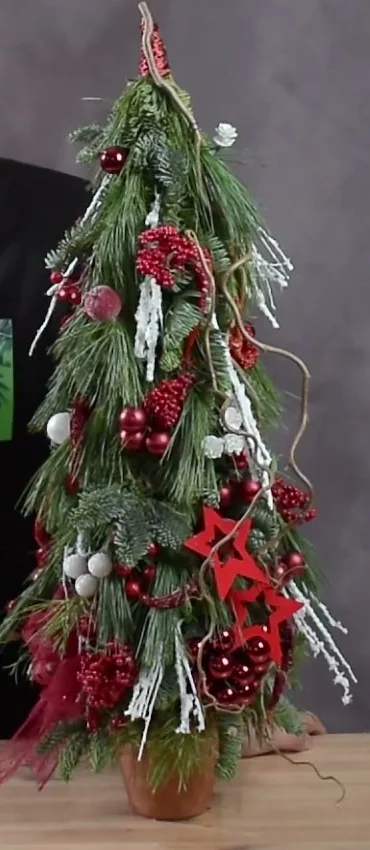
Potted greenery tree | Dense triangular form in pine and noble fir | Metal rod set in plaster inside a terracotta pot | Building the outline branch by branch, then trimming it |
Moss and citrus tree | Covered cone with an extended tip | Polystyrene cone mounted in a pot | Cleaning the moss and keeping the cone straight |
Framed fir tree | Triangular body with a recessed center | Polystyrene attached to a pot | A distinct front and a separate frame to cut |
Wire and rattan tree | Wire loops threaded with sticks | Rod in a wooden block | Shaping the open volume before adding decorations |
Open wire tree | Outline divided into open and woven cells | Cast plaster base | Fitting the crosspieces individually |
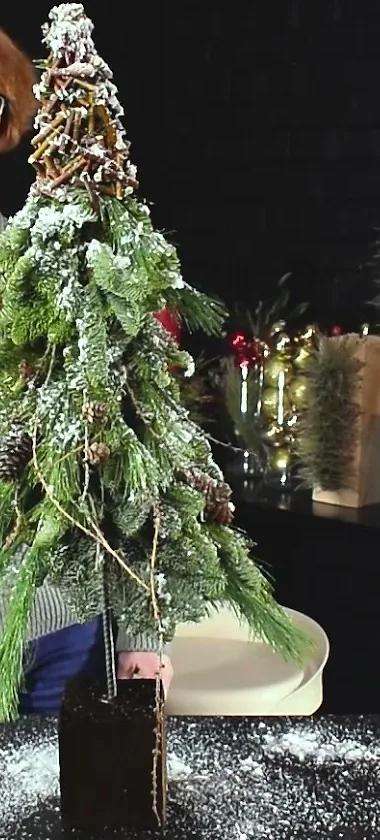
Tall greenery tree | Full lower section and a twig-wrapped tip | Rod in a wooden block | Making twig garlands before assembling the top |
Large branch tree | Spreading lower branches and a narrow top | Woven wire frame on a rod and wooden support | The example is 1.7 m tall and needs room around its lower branches |
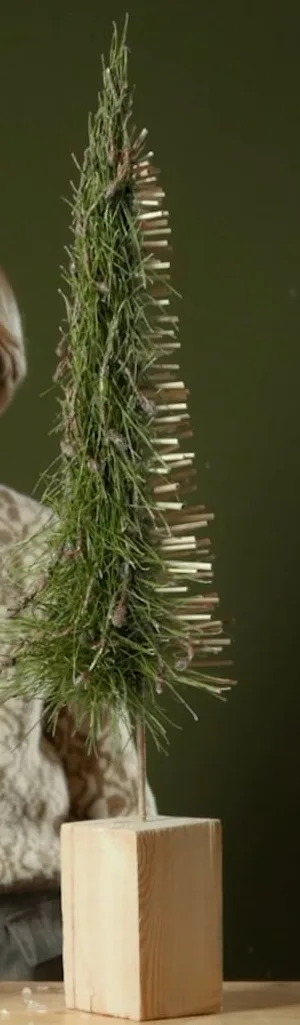
Pine needle and reed tree | Slender triangle with two different sides | Rod in a wooden block | Placing needles and threading reeds in different ways |
The other finished heights are not specified here. Before gathering materials, mark out the space for the base, the widest part of the tree, and the tip. A photograph can make a tabletop project and a larger piece look deceptively similar.
Greenery: a full tree or a framed triangle?
Potted greenery for a familiar Christmas outline
Pine and noble fir create a dense green surface. Short sections of foliage are bound to a metal rod from the bottom upward, with fuller branches low down and smaller pieces toward the tip. The triangle emerges as the layers build. The terracotta pot remains part of the design, with brown decorative branches linking its color to the tree.
Choose this approach if you want recognizable evergreen foliage and a red-and-white Christmas palette. Red dominates the example; striped candy decorations bring both colors together. Larger ornaments sit lower down, while the smaller ones continue toward the top. The work includes a shaping stage: trim branches that break the outline and add foliage where gaps remain.
Compared with a moss cone, this shape has to be built from separate pieces of greenery. If that repeated wrapping and adjustment appeals to you, it is a useful place to start. The finished outline carries the design before the ornaments go on.
See the potted evergreen tree and its step-by-step video. (video details)
A framed fir tree with decoration inside (video details)

This tree starts with a triangular polystyrene body and a second, thinner triangle cut into a frame. The frame forms a raised edge around the central area. Small pieces of noble fir cover the outside, held with bent wire pins. Cones, berries, small ornaments, cinnamon, and star anise fill the recessed center.
Consider it for a shelf or console where you will mainly see the front. It has depth, but its main feature is the boundary around the decorated triangle. Assembly involves cutting and covering the body before placing the greenery, unlike the potted tree built around a central rod. The pot needs to be considered early so its rim fits the bottom of the figure. This is a supported tabletop object, not a wall hanging.
The frame also gives small decorative pieces a defined place. If you enjoy choosing and grouping tiny details, that center offers a different kind of making from building an all-around green cone.
Moss, pine needles, and reeds: let the surface lead
A moss cone with dried citrus and cinnamon
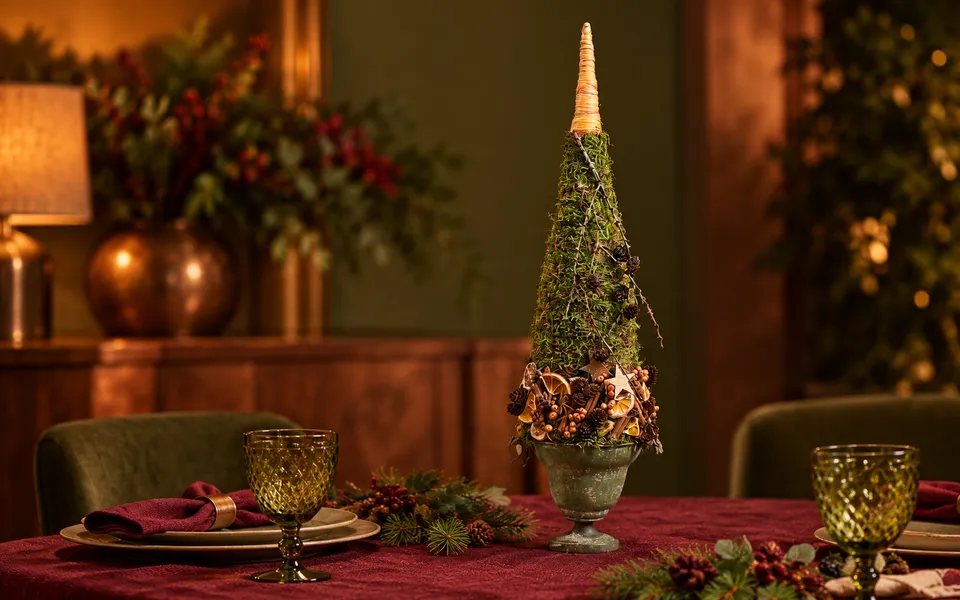
Moss makes a closely textured green surface, interrupted by slices of dried orange and lime. The cone beneath it can be bought ready-made or cut from polystyrene. A wire extension wrapped in yarn lengthens the tip, giving this tree a more drawn-out top than a plain cone.
Most of the decoration gathers in the lower section, across roughly a quarter of the tree's height. Cinnamon, star anise, cones still attached to small twigs, and wooden stars sit against the moss. The middle and upper sections keep their green texture. Choose it if you want the natural details to remain visible between areas of moss.
The main preparation is different from the greenery tree: clean the moss, secure it without bare patches, and mount the cone straight in its pot. Allow for the mess moss makes on the work surface. Decoration continues around the front, back, and sides, so this project rewards a spot where it can be viewed from more than one direction.
Pine needles and reeds for two contrasting sides (video details)

Loose pine needles form the dark, textured side of this tree. They are inserted into a three-dimensional tangle of wire. On the opposite side, short pieces of dried reed are threaded onto wire ends. Light reed sections balance the fuller needle-covered side, where small branches add lines to the surface.
Place it where the sides can be seen, perhaps on a separate table rather than pushed against a wall. Much of the interest comes from the change as you move around it. The narrow top and fuller bottom need repeated checking from different angles; needles and reeds are trimmed once the outline takes shape.
Placing the individual pieces takes patience, and the material itself does most of the visual work. If you prefer a tree with little ornamental decoration and an unusual surface, compare it with the moss cone: moss covers a ready-made form, while the needles build up within a wire structure.
Open constructions with room for the background
Wire and rattan sticks for an open volume

Wire ribs project from a central rod, longer at the bottom and shorter near the tip. They support loose, bulky wire loops. Rattan sticks pass through those loops, with longer sticks shaping the lower tree and shorter pieces filling the top. The internal wire is painted white.
Stars, ornaments, cones, and birch bark run vertically along one side. Decide which way that decorated side will face when choosing a spot. This tree suits someone drawn to the visible framework and rhythm of the sticks. The gaps belong to the design, so adding enough decoration to conceal them would change its character.
The work begins with the looped volume and the distribution of the sticks. Decorative choices come later. Compared with the fir frame, the shape spreads through space rather than presenting a filled center to the viewer.
An open wire outline on a plaster base
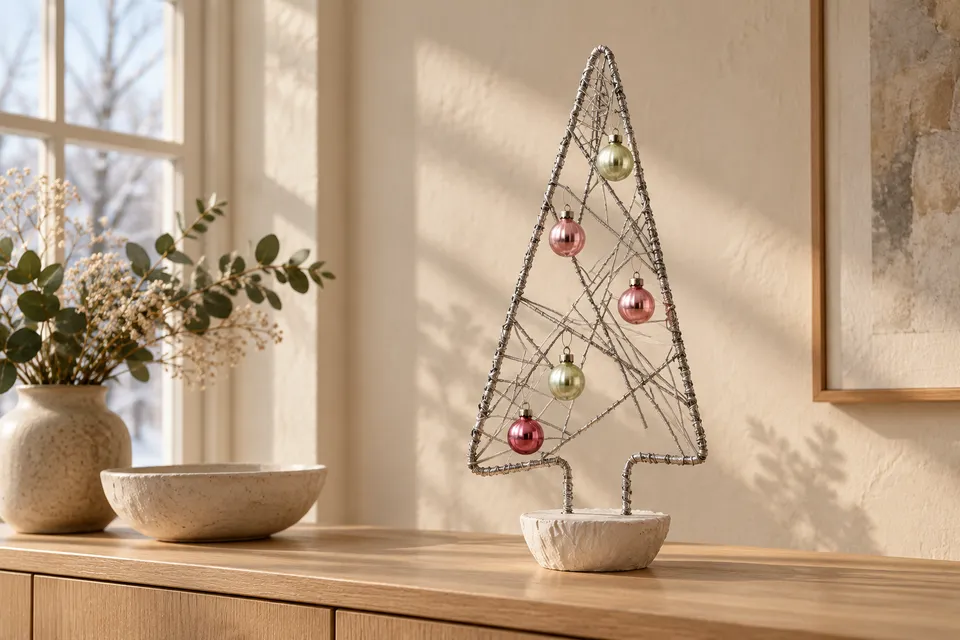
Bundles of wire form the outline of this tree. Crosspieces connect the sides; some cells are filled with fine decorative wire, while others remain open. Small glass ornaments punctuate the pattern without covering it. The plaster base is cast separately, using a pot as a mold.
Try a quiet background so the open and woven areas remain visible. On a busy shelf, the lines may be harder to read. Unlike the rattan version, this tree draws attention to its joints and the consistency of the wrapping. Each crosspiece is fitted to its position. An airy appearance does not imply a quick assembly.
The project includes a wire candle holder. For a decorative display, the candle can remain unlit. The main reason to choose this tree is the open pattern and the relationship between its outline, crosspieces, and solid base. For a closer comparison of the two wire approaches, see our wire Christmas tree guide.
Two taller trees for a separate spot
Full greenery with a twig-garland tip (video details)

The lower part of this tree is built around a metal rod. A wire support widens the first layer of greenery; noble fir, pine, and larch twigs continue upward, with cones added during assembly. Toward the top, greenery gives way to a finer twig pattern.
Short dry sticks are first wired into garlands. Those garlands then wrap around the upper section. Choose this tree if you like the transition from a full green base to a twig-covered tip. It has a different rhythm from the red-and-white potted tree, where ornaments are distributed across the green surface.
Making the garlands is a separate preparation task, so include that when deciding whether the project appeals to you. The finished height is not specified here. Reserve the spot according to the shape you intend to make, keeping the lower spread in view.
A large branch tree with a spreading lower edge (video details)

The example of this tree is 1.7 m tall. Larch branches attach to a woven wire structure on a central rod. They spread outward at the bottom and gather closer to the trunk toward the top. Ilex adds detail between the branches, while red ornaments hang at different levels, almost down to the wooden support.
Give this tree its own space. Check the available width near the floor as well as the height beneath a shelf or ceiling. The flared lower branches are part of the outline; measuring only the wooden base will miss them. A small tabletop is better served by the potted greenery or framed fir project.
Choose this larger construction if you enjoy shaping a framework around branches. The branches remain visually prominent, and the suspended ornaments extend the design into the space below them. It offers a substantially different result from a miniature dense cone.
Choose the kind of making you will enjoy
For a green tabletop tree, begin with the potted version. For moss and dried citrus details, choose the covered cone. On a shelf with one main viewing direction, compare the framed fir and the open wire outline: one gathers decoration inside a border, while the other lets the background show through. Rattan and pine needles offer two more ways to make the material visible. The taller projects need their place in the room settled first.
Write down the feature you want to preserve before choosing ornaments: dense greenery, open space, a slender outline, or two different sides. That small decision will help when your own materials differ in color or size. For more seasonal ideas, explore Christmas and winter floristry.