Christmas greenery does more than supply a green background. Short, dense branches can build a clear surface; long needles make a looser edge; softer sprays change the colour and rhythm. Choosing the texture first helps you decide how to cut, group and attach the material.
The photographs here show three different projects: fir prepared for a wreath, pine cut for a potted arrangement and bundles bound for a larger garland. They compare ways of working with greenery. They are separate examples, so the base and fixing from one should not be assumed to belong to the next.
Start with the form you need
Think about the finished shape before cutting the first branch. A wreath needs an even ring and a continuous flow. A small tree needs a wide lower area and a narrowing tip. A garland needs connected lengths of greenery, while an arrangement in a pot may need many small, repeated units around its base.
Hold a branch against the intended form. Notice its width, the length of its needles, the direction of its side shoots and the thickness of its cut stem. A handsome full branch may be too large for a narrow point; its smaller side pieces may be exactly what you need there.
Fir: a dense surface and a clear direction
Fir sold for floristry as nobilis has a muted blue-green colour. That quieter colour can sit with red, white, pink or a brighter accent. Look at your actual branches when choosing a palette, because the work is made from those pieces, not from a colour name alone.
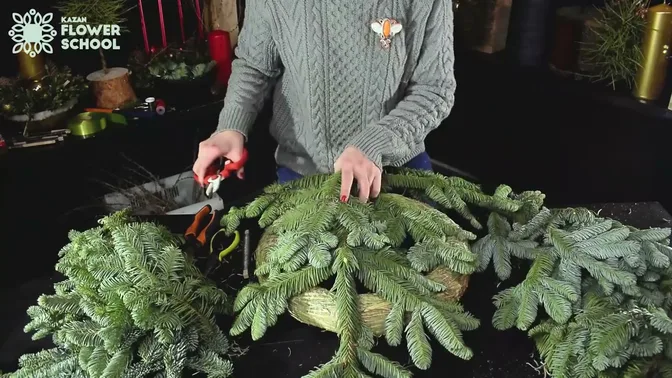
In the wreath example above, short fir pieces overlap around a ring. The visible needle faces create the surface, and each new layer conceals the wire holding the preceding one. The branch direction is repeated all the way around, including the final join, so the eye follows the circle without an abrupt stop.
Prepare fir with the back of the branch toward you. Cut useful side sections so the cut ends can sit inside the construction. Keep fuller pieces for the broad areas and smaller pieces for finishing. In a larger surface, substantial sections can cover space quickly; a compact wreath needs pieces matched to its narrower width.
Follow the complete fir wreath process, from the base to the final join.
Pine: longer needles and a lighter edge

Pine brings longer, more open needles to the surface. That texture can soften the edge of a form or contrast with denser fir. The material needs to be cut and grouped for the scale of the project; a long branch does not have to stay whole.
For the potted example, the maker cuts small pine sprigs and binds three together. The fixing leaves a wire end that can enter the prepared base in that project. Twine or wool yarn covers the visible wire and repeats a colour from the decoration. Many of these units are arranged around the pot, then the upper outline is trimmed.
Treat this as one preparation method for one support. A wire end used in a prepared pot base is different from the continuous reel wire around a wreath ring. Decide where the greenery will be held before choosing how much bare stem or wire to leave.
Softer sprays offer another kind of surface
Thuja is another option for winter arrangements. Its softer sprays and greener, sometimes yellow-green colour offer a different effect from the muted fir. Neat smaller branches can go into bouquets or arrangements; larger branches can be divided into useful sections.
The photographed examples in this guide are fir and pine. When considering another greenery, compare an actual piece with the design: does it make the surface denser or more open, and does its colour support the chosen palette? Keep the form of the material visible rather than expecting every green branch to behave the same way.
Build a garland with overlapping bundles
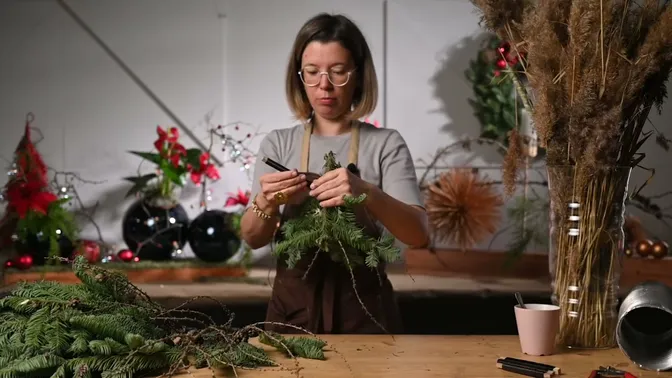
A flat garland can grow from one bundle to the next without a ring underneath it. Gather the first greenery and bind it firmly with reel wire. Lay the next bundle over the stems and continue binding so the new fixing also catches the previous bundle. Repeating that overlap connects the length.
The important point is the connection between bundles. Wrapping only the new handful leaves it separate from what came before. The larger garland demonstration uses more substantial binding than the small wreath. Its required support and attachment depend on the size and display position of the finished construction.
Branches and other textures can be included deliberately. In that garland project, larch twigs add clear lines and reed adds a softer volume. Keep those additions subordinate to the intended shape. A few graphic branches can change the character without making every part equally busy.
Match the fixing to the base
A wreath ring, a potted support and a broad panel ask for different techniques. On the wreath, reel wire encircles the base. In the pot example, small wired units enter a prepared support. For a large panel, separate wire pins hold fir sections against a solid core. The visible green surface may look related, while the construction beneath it is different.
Prepare enough small pieces before covering a large area, but keep checking the actual work. Add greenery where the base shows, conceal the fixings and inspect the edges from the angle in which the piece will be seen. A surface that looks full while lying flat may reveal gaps when lifted upright.
Use contrast with a clear purpose
Combine textures where each has a role. Dense fir can establish the body; longer pine needles can soften it; a few bare branches can carry a line beyond the green surface. In a small tree, repeat the different greenery through the height so the upper and lower sections still belong together.
Before adding ornaments, step back and check the silhouette, branch direction and distribution of texture. If the green form is incomplete, correct it with greenery first. Then place the decoration where it can be seen without flattening or covering all the character of the branches.
Build a small greenery tree with fir and pine around an upright support.