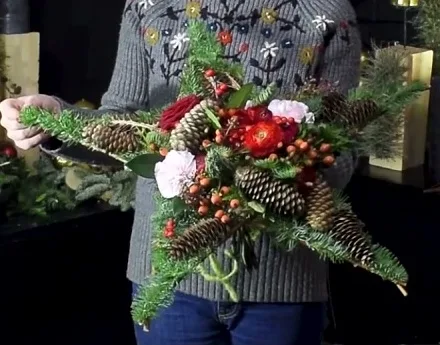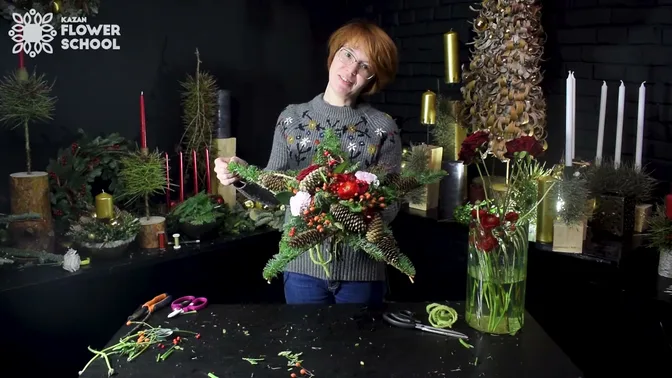
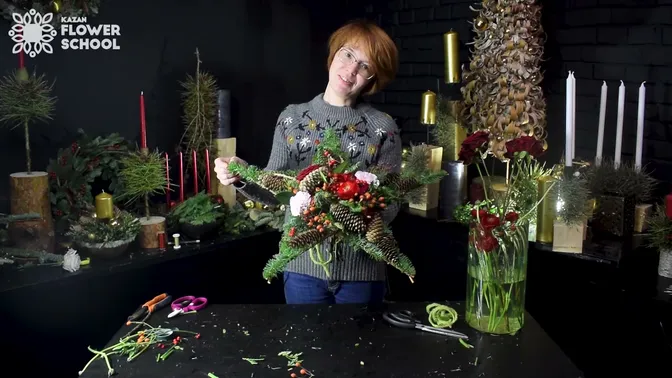
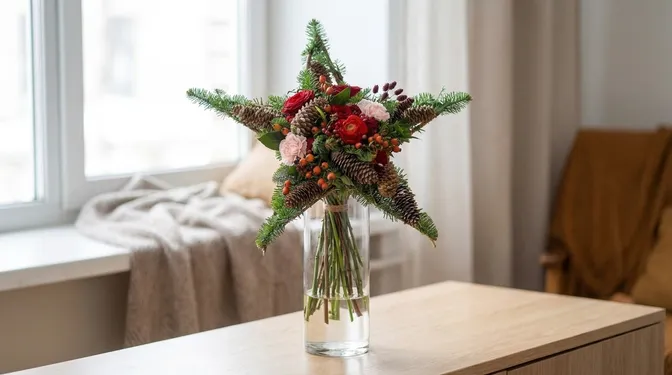
A five-pointed star spreads around a small gathering of red flowers, pink carnations and orange rose hips. Fir softens the straight twig lines. Split cones sit along the points, with their pale cut surfaces showing among the needles. The flowers rise through the middle, leaving the star visible around them.
This Christmas star bouquet has a handmade frame and a handle beneath it. You hold the frame and flower stems together as you build the bouquet, then bind the whole bundle. The work begins flat on a table; it becomes a bouquet when the handle, supporting mesh and fresh stems come together.
Gather the materials around one clear shape
The example uses five straight, dry sticks cut to 60 cm each, about 24 inches. This is the length of each stick, rather than a measurement across the finished star. Choose sticks that can hold their shape while you bind and handle them. Remove small side shoots and make the ends straight.
For the frame, gather the following:
- Five sticks of equal length.
- Florist binding wire, 0.6 mm in the example, plus fine decorative wire for the mesh and greenery.
- Five lengths of 1.2 mm wire for the handle, with floral stem tape.
- Noble fir, cut into short pieces, and cones that can be split lengthwise.
- Pruners, wire cutters and pliers.
The flower bundle combines red ranunculus and roses with pink carnations, orange rose hips, red ilex berries and burgundy skimmia. Small myrtle sprigs add finer lines. More noble fir connects the flower-filled center to the green points. A whole cone on a wire stem provides one larger textured detail among the flowers.
You also need bouquet binding tape and decorative cord. The finish here uses a soft green felt cord around the binding point. Prepare the flowers and tools within reach before you start filling the frame: one hand will be holding the growing bouquet.
Build a firm five-pointed star
Lay the sticks on the table as a continuous five-pointed star, with an open pentagon in the middle. Adjust the crossings until the points look even. There are ten places to secure: the five outer tips and the five inner crossings.
Bind each joint with wire. Wrap it around the crossing, then twist the ends together to hold the sticks firmly. Use pliers if the twist is difficult to grip. Snip excess wire and bend the ends close against the wood so they cannot catch your hand or the flower stems.
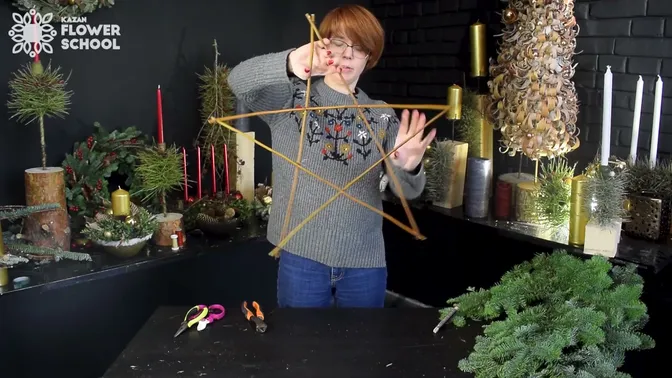
Lift the star by a stick and check the joints. If two sticks can slide at a crossing, tighten that joint now. Later, fir and cones will hide the bindings and make them harder to reach.
Make a mesh on the points
Wind fine decorative wire back and forth across each triangular point. This creates a small web to support the fir. Leave the central pentagon open at this stage; a separate support for the flower stems comes later.
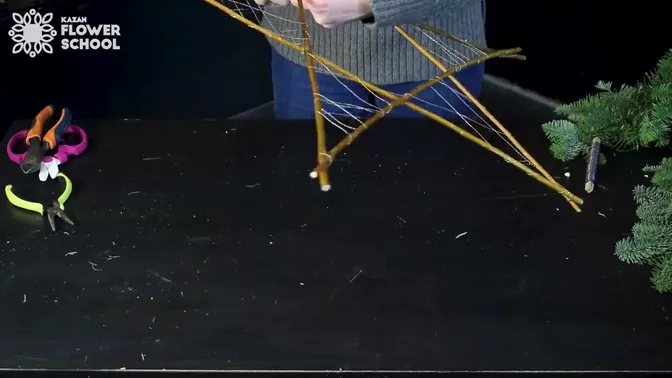
Fine florist wire or thread can replace the decorative wire for this part. Keep the web light enough to work through. Its purpose is to give the short fir pieces something to rest against and attach to.
Cover the points with fir and cone halves
Cut noble fir into pieces about 10–15 cm long, roughly 4–6 inches. Turn each branch so you can see its underside as you cut and keep the cut away from the needles you want to retain.
Start at an outer tip. Lay a piece over the twig joint to hide the binding, then wind the fine wire around it. Add the next piece slightly farther inward and continue toward the base of the point. Place each piece before binding it, rather than trying to wrap a loose stack at once.
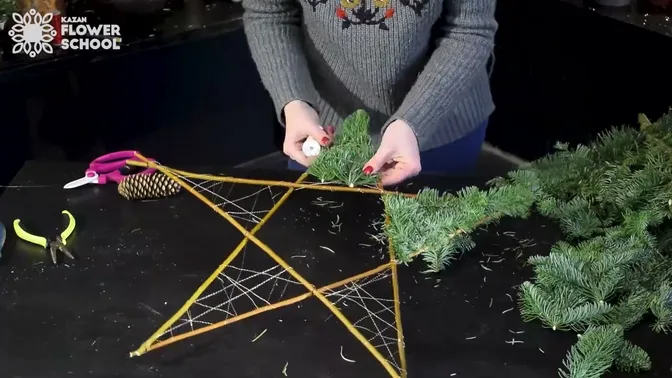
Watch the outline as the greenery builds up. Needles can soften the edge, but a wide spray across an inner angle will make the star harder to recognize. Keep the five points distinct before you move on to the cones.
Split the cones lengthwise. A half cone sits closer to the frame than a whole one, and its cut face gives a different pattern from the outer scales. Hold the cone firmly on a stable surface while cutting; use a cone and a tool you can control safely.
Plan on about one cone half per point. Arrange the halves along the points, alternating cut faces and outer surfaces as you prefer. Bind them with the fine wire. Set the amount by the space available: leave enough fir visible for the green points to read as part of one star.
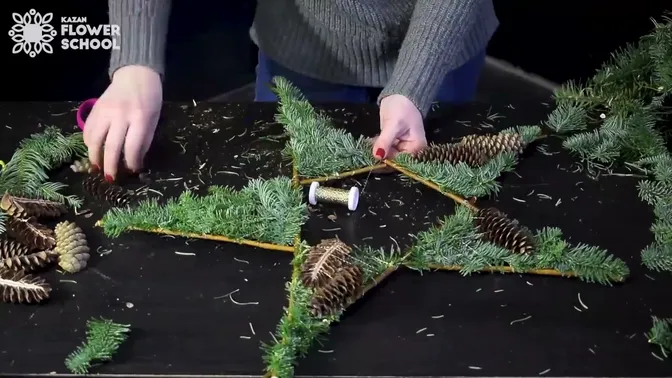
Add the handle beneath the frame
Cover each of the five thicker wires with floral stem tape. Bring them into one bundle and tape about 15 cm, roughly 6 inches, together at one end. This joined section becomes the handle. Fan the remaining ends outward.
Turn the star over and place the handle at its center. Attach the five spread wires to the twig structure, taking each wire under a stick and bending it securely around the wood with pliers. Work around the frame so the handle stays central. Tuck every cut end back against the structure.
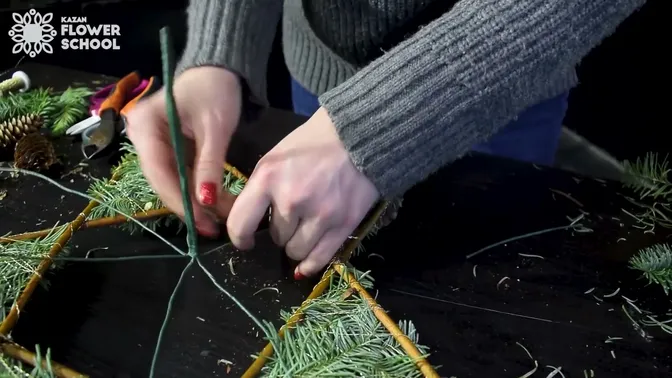
Hold the handle and lift the frame gently. Check that it carries the star without shifting. Add the flower support only after the handle is secure.
Run fine wire between the handle's supporting wires inside the central opening. Make several smaller cells for stems to pass through. These cells help you distribute the flowers across the middle instead of letting every stem gather in one gap. Leave openings that you can pass your chosen stems through without forcing them.
Prepare the flowers and set the color
Strip side shoots and needles from the parts of the fir stems that will sit in or below the binding. Clear the other stems at the same point. Keep their flowering and leafy tops intact where they will show above the frame.
Prepare the whole cone separately. Wind wire around it, hiding the wire between the scales, and bring the ends together below it. Cover this wire stem with green or brown floral tape. You can now place the cone through the mesh alongside the flowers.
The color moves from red through burgundy to orange, with a little pale pink between the stronger tones. Glossy ilex berries catch the eye quickly, so use them in small amounts. Rose hips carry orange farther through the bouquet, while myrtle adds a lighter line beside the fuller flowers.
You do not need to fill every opening with a large bloom. Alternate flower heads, berry clusters and fir so the center feels full without covering the green frame. Keep checking it from the front as well as from above.
Build the bouquet through the star
Start with fir stems spread around the frame's inner edge. Hold them together with the handle beneath the star. Add each stem at a similar angle, turning the bundle slightly as you work so the stems form a spiral below your hand. Avoid crossing new stems back against that direction.
Pass the flowers through different cells in the central mesh. Place fuller heads where you need color and use the smaller branches between them. The wire cells guide placement; your hand keeps the stems and frame together until you bind them.
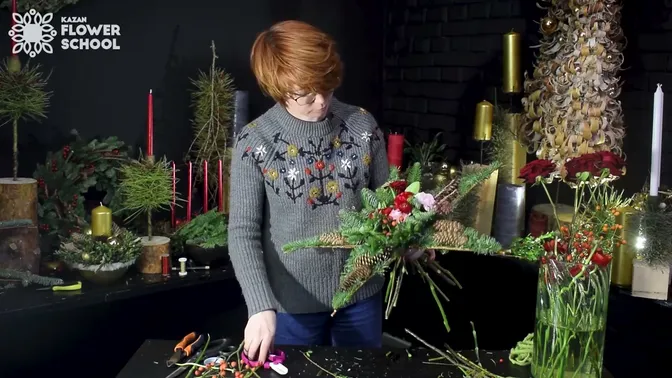
Stop occasionally and look along the star's edge. If a myrtle branch hides a point or bridges an inner angle, move it inward or trim it. Fill visible gaps within the flower-filled center, then add the wired whole cone as a final textured accent.
Bind and finish the stems
Keep hold of the bundle at its binding point. Wrap bouquet binding tape around it two or three times, pull the ends snug and tie two knots. Check that the frame and stems stay together when you ease your grip. Then cover the binding with decorative cord and knot it in place.
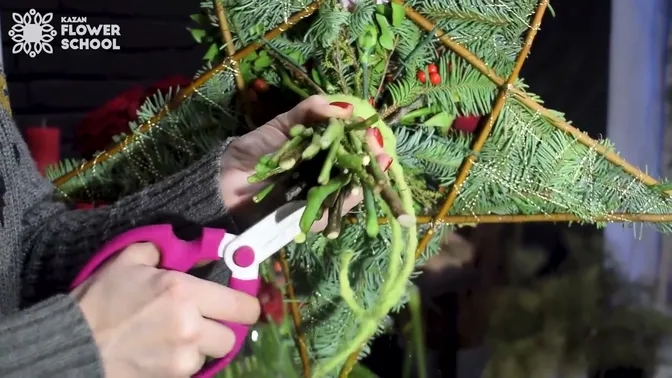
Trim the flower stems about 2 cm, just under an inch, longer than the end of the frame's handle. This leaves the fresh stem ends below the constructed support. If you display it in a vase, choose a stable one that supports the bouquet and lets the cut ends reach water. Keep the twig star and its decorations above the rim.
Before putting it in place, turn the bouquet once more. Check the wire ends, the handle and all five points. The red and pink flowers should hold the center, with orange hips and small berries between them. Around that center, fir and cone halves keep the shape of the twig star visible.
For a project that hangs on a wall, try the twig star with greenery. For help choosing branches, see the Christmas greenery guide, or browse more Christmas and winter floral projects.