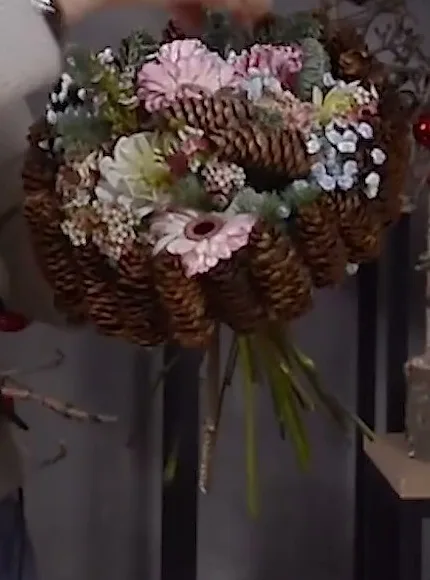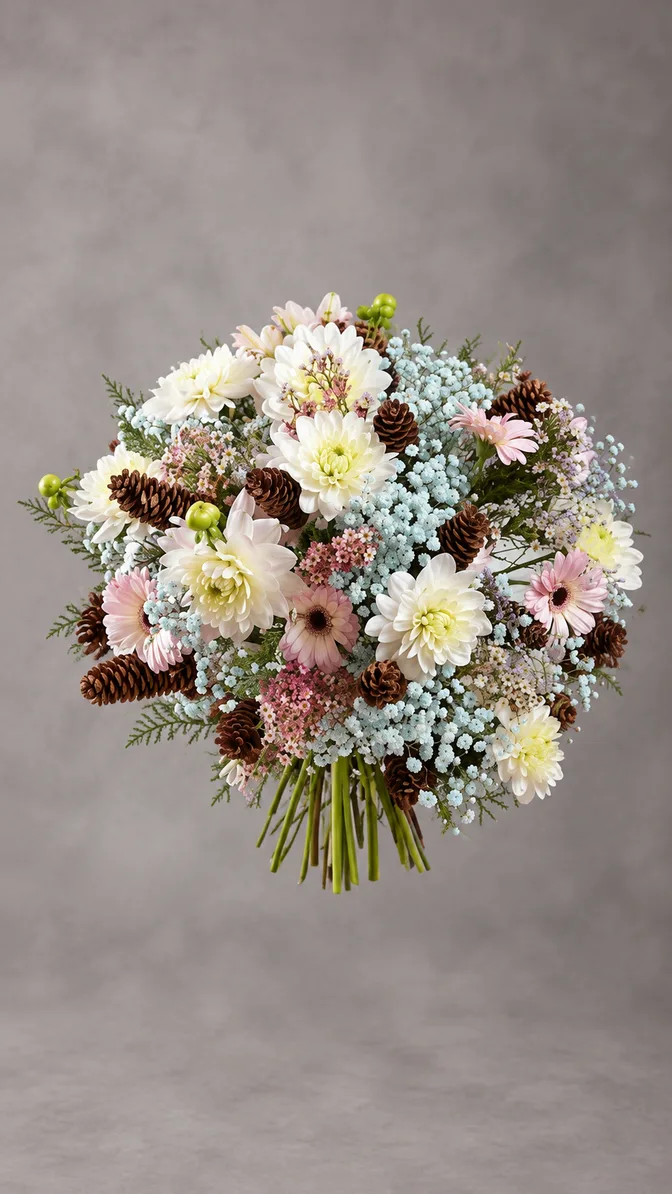
Long brown cones can draw a loose outline around pale flowers or form a close, upright rim beneath them. The same blue gypsophila, soft pink gerberas and fir look quite different in those two settings. One bouquet spreads into a broad, airy dome. The other gathers its flowers inside a compact crown of cones.
The difference begins with the wire beneath the flowers. An open framework sends individual cones outward on separate stems. A cone ring fixes the edge before you place the first flower. Choose the outline you want, then build the support around it.

Choose the silhouette before counting stems
The broad version leaves space between the cones and allows the small flowers to spread through several levels. The finished wire structure disappears into the flowers, while its cones remain visible around the sides and above the surface. It suits a rounded bouquet with a soft, irregular edge.
The compact version has a stronger horizontal line. Its cones stand side by side, with their tips pointing upward. Flowers fill the opening and rise above that rim, but their side branches stay close to the circle. The result looks lower and more contained even though it uses a similar palette.
For the ring, its circumference determines the space for flowers. For the open frame, the spread and height of the wire arms determine the outline. Set that shape before deciding how many stems it will take to fill it.
Materials for the two frames
Use dry, elongated spruce cones with scales that stay attached when you handle them. For the ring, sort cones into a group of similar heights. A cone much taller than its neighbors will stand above the rim, so set it aside unless you want that change in the outline.
Both frames use 1.2 mm wire, floral stem tape, wire cutters and pliers. The open frame starts with twenty wire lengths, each 40 cm long, about 16 inches. The ring needs two long pieces of wire, about 2 m each, plus ten separate wire lengths for its handle and support. The number of cones for the ring depends on their width and the circle you want to make.
For the flowers, gather noble fir, blue-dyed gypsophila, pale gerberas and small flowering waxflower branches. Dahlias add larger, soft-colored heads; carnations give the compact version extra color and fullness. The blue comes from the dyed gypsophila. You can keep the same broad palette across both bouquets without using identical stem counts.
Prepare pruners and bouquet binding tape as well. Before working on either structure, practice a short, firm twist with two spare wires. Long, loose twists leave gaps where you need support.
The open frame: build two levels of cells
Bring the twenty 40 cm wires into a bundle. Wrap roughly the lower third with floral stem tape to make a handle, covering its cut end as well. Spread twelve of the free wires around the top of the handle and leave the remaining eight for the upper structure.
Twist the twelve lower wires together in pairs. Keep the twists close and even, using about four turns for these first joins. Open the two free ends of each pair out to the sides. Then join each free end to the neighboring wire from the next pair. Continue around the handle to make six cells.
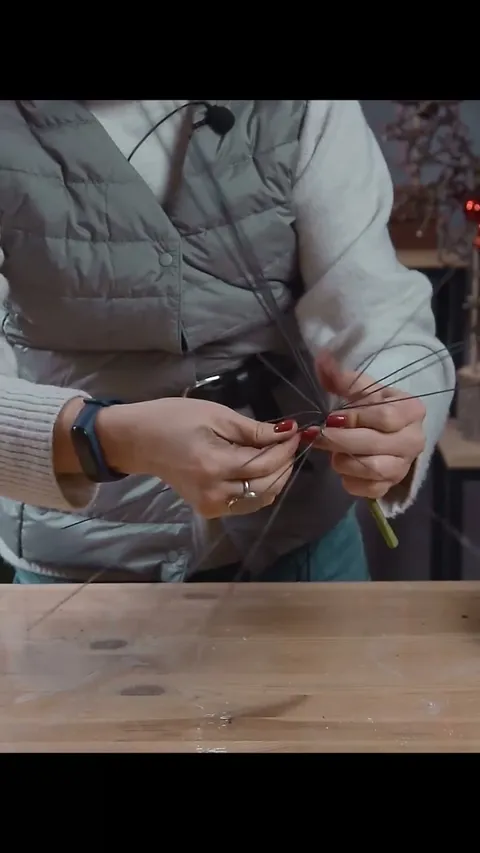
Keep the cells evenly spaced around the whole circle. Three should occupy each half when you look at the frame from above. Repeat the joins to make a second level of cells, using two or three close turns at each join. The cell edges should spread outward rather than bunch against the handle.
The eight wires left for the upper part provide a second set of supports. Bend them into open diamond shapes and secure their crossings with twists. Spread these upper supports at different angles so the eventual cones can follow a rounded dome. Check the side view while the structure is still empty: you need both a lower layer and space above it for the flower heads.
Attach the cones without making a solid rim
Fasten a cone to each free wire end, guiding the wire around it between the scales so the cone sits securely. The cones belong to the individual arms of the frame. They can point in different directions as the arms spread.

Hold the structure by its taped handle and look at it from above and from the side. Adjust the arms until they describe a broad, rounded outline. Check each cone attachment before adding flowers. A cone that turns or slips now will be harder to reach once the wire cells are full.
This version gets its open edge from the spaces between the cones. Keep those spaces as you fill it; the small flowers can occupy the interior at several heights.
Fill the open frame from the lower level upward
Divide the fir into separate sprigs. Clear needles and side shoots from the parts that will enter the binding point. Prepare the gypsophila in individual branches too, cutting off low side branches that would snag in the wire cells.
Begin with fir in the lower part of the frame, spreading it around the handle. Add gypsophila through both the lower and upper cells. Short branches can fill the base, while longer ones reach toward the cone tips. In this example, branches around 25 cm long are useful in the lower part; their final position depends on where you hold the stems beneath the frame.
Add the larger flowers after the fir and gypsophila establish the dome. Let the pale gerberas and dahlias remain visible among the small blue flowers. Finish with waxflower branches, keeping their flowering tips intact and their lower stems clear.
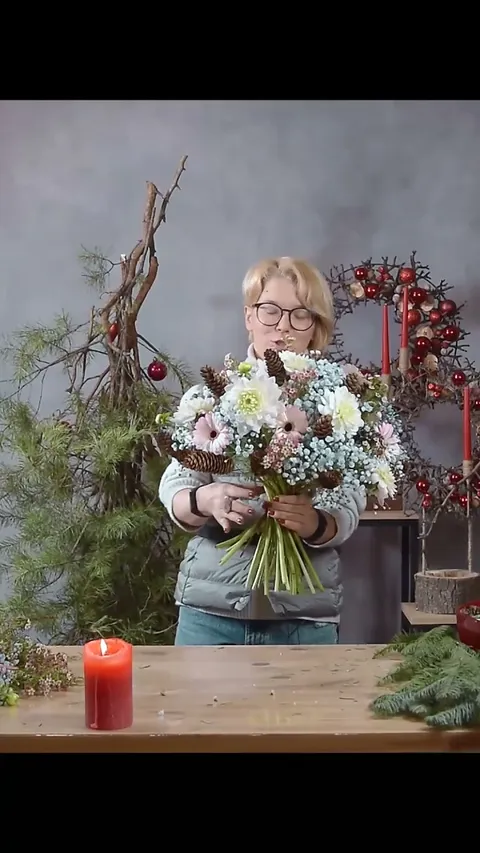
Turn the bouquet and check the outline. Where the surface dips, adjust or add a branch at that level. Where a dense cluster hides a larger flower, move the smaller branches around it. Bind the stems and handle together when the shape holds its rounded spread.
The compact frame: make a fence of cones
Lay the two long wires within reach. Wrap the first around the lower part of a cone, passing it beneath the scales to hide the wire. Make two short twists beside the cone. Wrap the second wire around the same cone at a higher point, around the middle of its height or slightly above it, and twist again.
Add the next cone to both rows of wire in the same way. Keep its base level with the first. Two twists between neighboring cones leave a short connection; extra twists would widen the gaps and loosen the line of the rim.
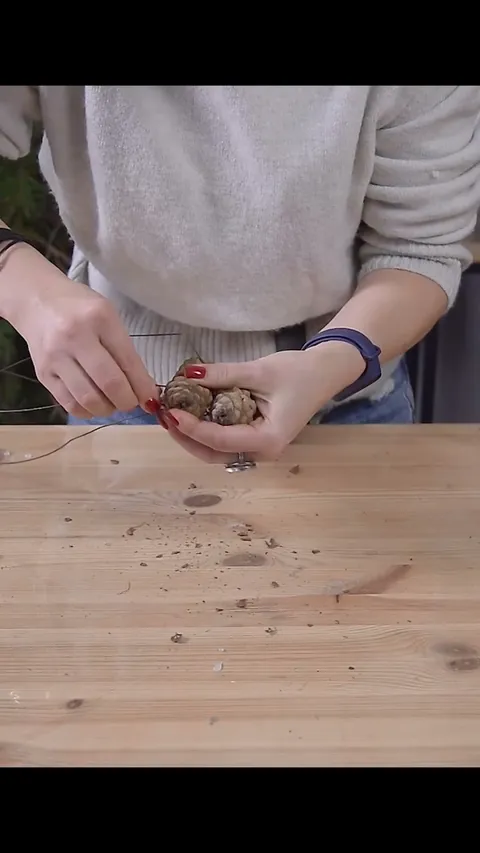
Continue until the strip can curve into the circle you want. In a small trial ring, fifteen cones give an approximate diameter of 16–17 cm, about 6–7 inches. Wider cones or longer wire joins will change that measurement. The compact bouquet here uses a larger ring. Check your circle before closing it and add cones until it has the space you want for flowers.
If a wire runs short, start a new length around the last secured cone and continue from there. Remove the exposed short tail and tuck the new fastening beneath the scales. Avoid cones that crumble as you work; their loose scales cannot give the wire a firm hold.
Close the strip by joining its final cone to the first at both wire levels. Keep the joins on the inside and trim and tuck the ends. Stand the ring on the table to check that its edge is even.
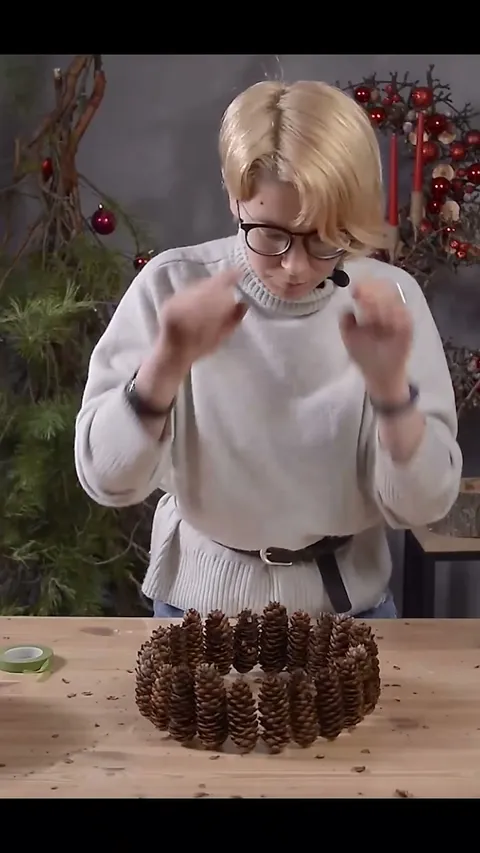
Give the ring its own central handle
Bundle ten wires and tape their lower section to make a handle. Spread the free wires, join them in pairs and weave two levels of cells using neighboring wires, as for the open support. Keep the twists firm and the spread even.
Check the cone ring for roundness before attaching this support. You can use the outside of a round pot as a temporary guide, then remove it. Turn the ring over and position the handle in the exact center. Pass the support's free ends through the lower row of wire that holds the cones together.
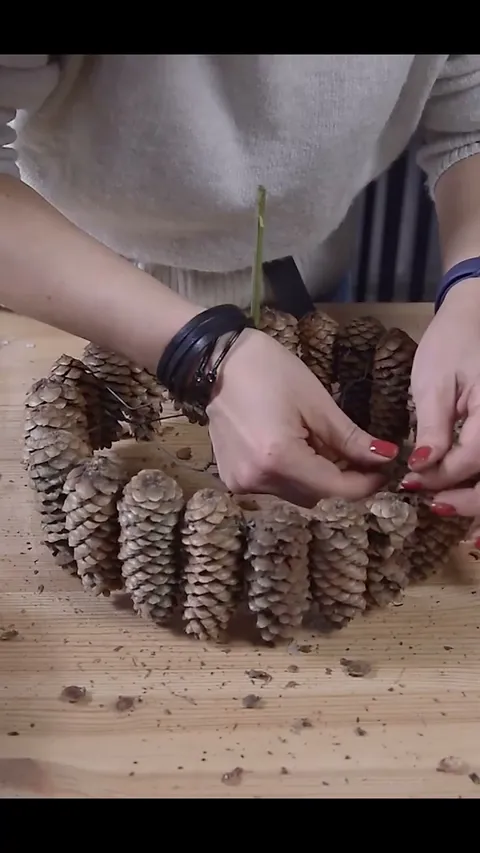
Trim an end if it is too long to pass through neatly. Bend the projecting ends inward toward the center, then check that none remain exposed. Lift the frame by the handle and inspect it from below. The handle should stay beneath the middle of the circle, with the ring supported evenly around it.
The wire quantities here belong to these examples. Heavier cones may need a stronger support, so check the empty ring before you fill it. If the frame sags or the handle moves to one side, correct the structure first.
Keep the compact bouquet inside the rim
Prepare fir and gypsophila as individual branches. Trim low forks before inserting them; a branch that splits too close to the binding point can bunch up inside the wire support.
Start with the shortest fir sprig in the center, then distribute the rest outward. Add short gypsophila in the middle and slightly longer branches nearer the edge. Keep the side growth within the cone circle, with just enough height above it to reveal the flowers. This is where the compact outline takes shape.
Place the dahlia a little away from the center. Group two gerberas close together at slightly different heights, then place the third to one side. That creates a focal group without lining all three heads across the bouquet. Add carnations where you want a small patch of color or a softer edge between flower heads.
Two extra cones can sit horizontally among the flowers. Wrap each on a separate wire stem and cover the wire with floral stem tape. Place them together or at different heights, checking that they stay secure. A few flowering waxflower tips finish the spaces around them.
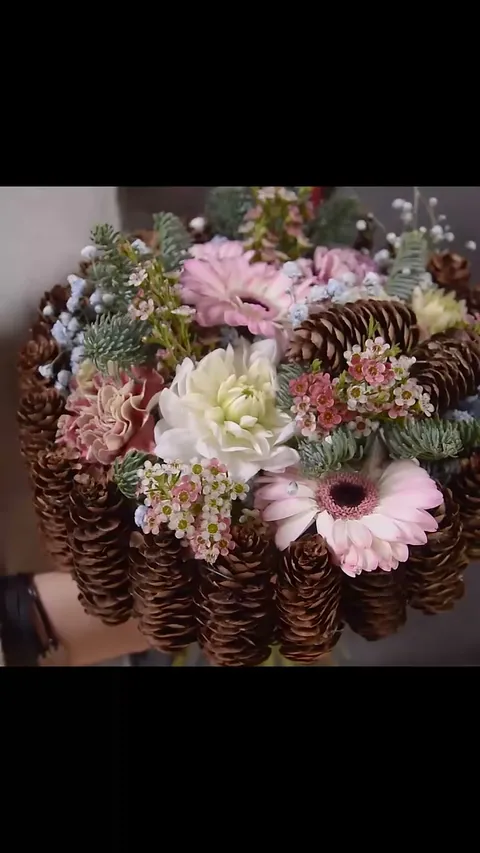
Bind the flower stems and the frame handle together once you are happy with the outline. Look from the side before finishing: the ring should remain visible below the flowers, and the stems should gather beneath its center.
Check the difference in the finished bouquets
Set the two forms beside each other and look at their outer edges. In the broad bouquet, you can follow the separate cones around a soft spread of flowers. In the compact bouquet, you can follow the connected cone rim around one contained group. Similar flowers make the effect of the frames easier to see.
Choose the open structure when you want the cones to sit among the flowers at different levels. Choose the ring when you want an even border beneath the flower heads. Keep the frame's handle centered and its wire ends tucked in whichever outline you make.
For more on choosing fir and other branches, use the Christmas greenery guide. Find other shapes and materials among the Christmas and winter floral projects.