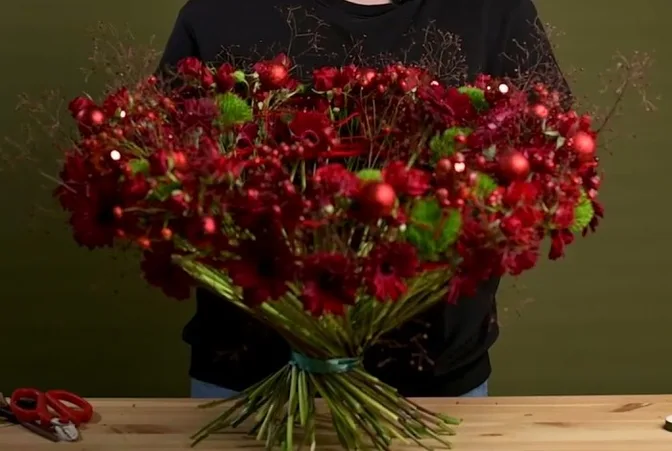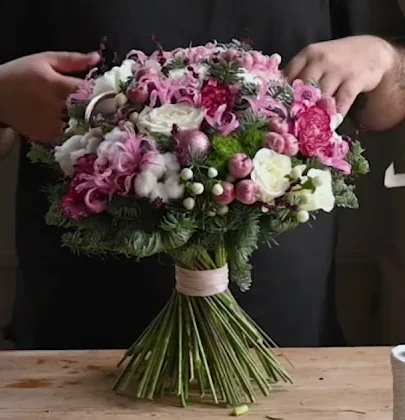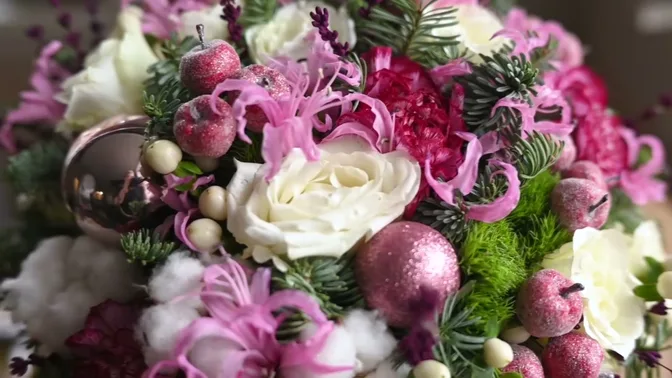
White roses, pink nerines and small glittering ornaments emerge from a dense cushion of fir. Cotton adds soft white patches between the flowers; glossy berries and green dianthus bring a different texture. The outline is a rounded dome, with greenery curving underneath the outer flowers. There is no paper collar to finish the shape for you. The flowers and fir make the whole silhouette.
This holiday bouquet is assembled in the hand, with prepared fir pieces and decorations placed among fresh flower stems. Each element joins the same spiral. The centre sets the height, and the outer flowers sit progressively lower, so the finished bouquet looks rounded from the side as well as circular from above.
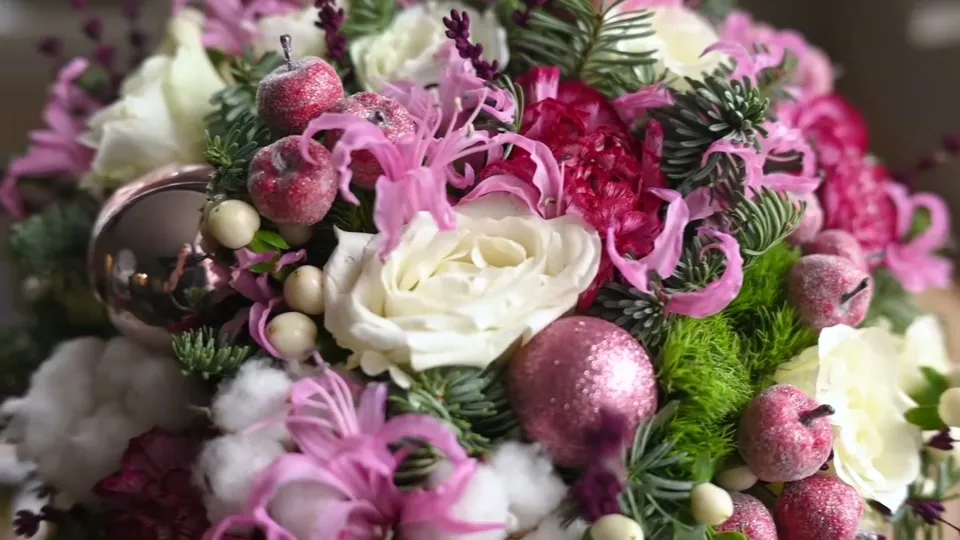
Gather flowers, fir and small decorations
The bouquet combines white roses, pink carnations, pink nerines, green dianthus, hypericum berries, cotton and dyed dried lavender. Fir supplies much of its fullness. Small decorative apples and baubles sit among the flowers rather than hanging outside the outline.
Choose a palette you want to repeat around the bouquet. Here, white flowers and cotton lighten the pink and purple; green flowers and fir connect the separate groups. You can change the colours while keeping the rounded shape and repeated distribution of materials. White flowers with greenery, or red and white flowers for a brighter Christmas palette, are other options.
Keep these tools and supplies beside the prepared flowers:
- Wooden skewers for the fir, cotton and decorative apples. Choose their length to suit the size of the bouquet you are making.
- Florist stem tape for joining short materials to the skewers.
- Florist wire for the baubles. The demonstrated fastening uses 1.2 mm wire.
- Secateurs, wire cutters and a suitable tie for the finished bundle.
- Small non-glass baubles with removable caps and decorative apples already mounted on wire.
Set aside some fir for the final collar before using the rest. Prepare the short materials first, so you can pick each one up by its own stem during assembly. For a closer look at different foliage textures, see the Christmas greenery guide.
Turn a large fir branch into separate picks
A whole fir branch is awkward to place among flower stems. Divide it into smaller pieces. Work from the back of the branch and cut in the direction the needles grow. Keep useful side pieces rather than cutting everything into equal lengths.
Strip the needles from the lower end of each small piece. This bare section will lie against a wooden skewer. Start the stem tape on the skewer, lay the cleared fir stem alongside it and wind the tape around both. The skewer's pointed end faces up towards the fir, leaving its long lower section available to hold in the bouquet.
The wooden pick gives each fir piece a straight handle. Make the attachment before you begin arranging; a loose sprig is difficult to repair while your other hand holds a growing bouquet. Repeat with the remaining pieces, then lay them where their handles are easy to reach.
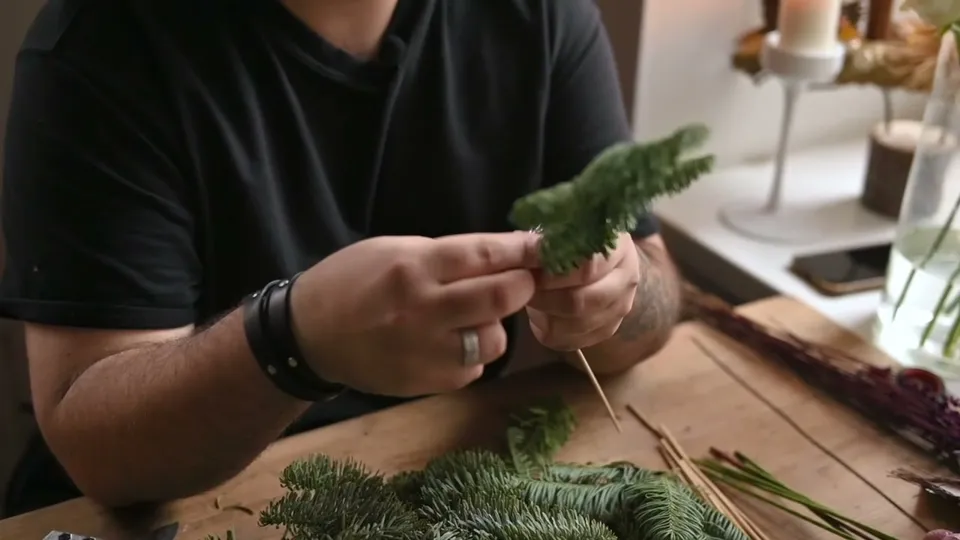
There is no fixed number of fir picks for every bouquet. Branch size and the size of the finished work change how much foliage you need. Aim to have enough prepared pieces to place greenery repeatedly between the flowers, with the reserved pieces still available for the outside edge.
Give cotton and ornaments their own stems
Group small decorative apples before attaching them to a skewer. Two or three together make a visible cluster among larger flower heads. Gather their existing wire stems, place them alongside a wooden skewer and tape the join. Keep the little apples together at the top rather than spreading them along the handle.
Cotton can be prepared in the same way: use its short stem as the attachment point and tape it to a skewer. Remove the dry casing beneath each cotton head before taping it to the skewer, so its fragments do not scatter through the white fibres.
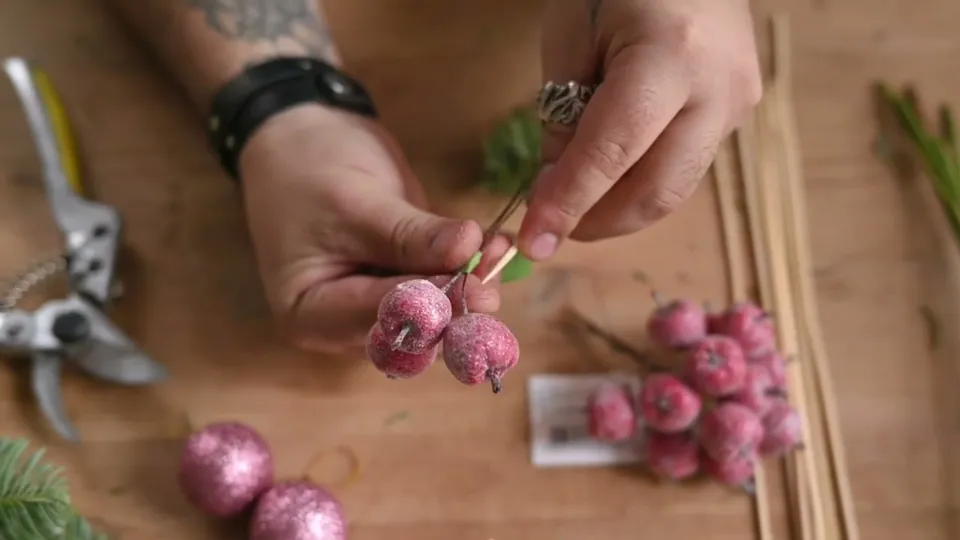
Use non-glass baubles for this bouquet. Remove the loose hanging cap instead of relying on its little loop to hold the ornament. The wire fastening goes around the bauble's neck, with the wire ends brought together into a stem below it. Twist the ends together and tape the resulting handle. This keeps the fixing separate from the removable cap and avoids gluing a skewer into the ornament.
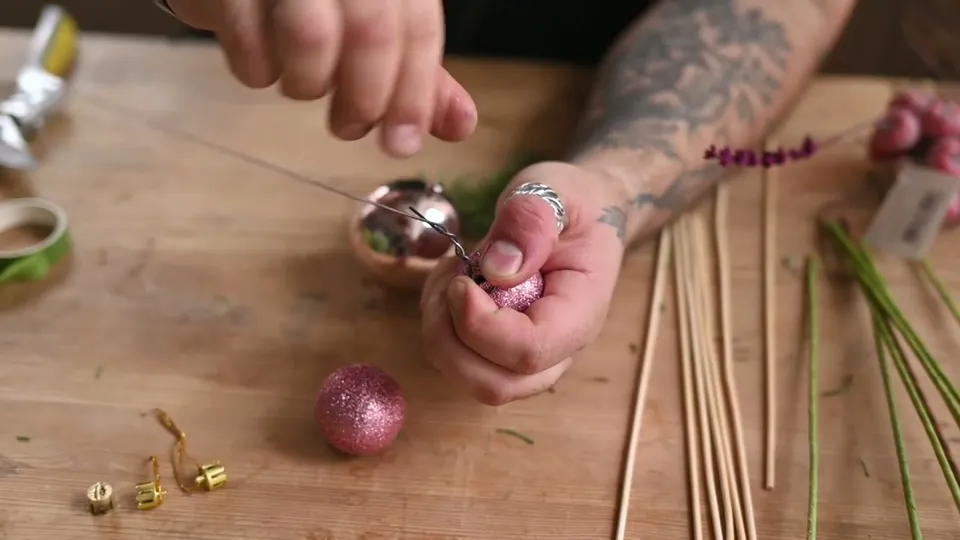
Prepare the apples and baubles now, but leave them beside the bouquet until the flowers and fir have established its shape. Their final positions will be easier to judge then.
Start the centre and keep one spiral direction
Begin with a central flower. A white rose starts this bouquet, though the centre does not depend on that particular flower. Add another flower at an angle across its stem. Continue placing stems in the same direction around the point where your hand holds them. Beneath that point, the lower stems begin to fan out.
Place fir between the flowers as you work. Add cotton, berries and the other flowers among them, turning the bouquet in your hand after each addition. The turn brings a new part of the outline into view and stops you building everything on the side facing you.
At first, keep the main flower heads close to the same height. The light, open nerine flowers can rise a little above this surface, where their curved petals remain visible. Avoid burying them beneath the larger roses and carnations.
Keep the stem bundle clear of foliage at the holding point. The smooth wooden picks need to slide into the same spiral as the fresh flower stems. A mass of leaves or needles in that area makes later additions harder to place.
Lower the outer rows to form a dome
Once the central flowers establish the top, stop adding every new head at that height. Place the next flowers lower as the bouquet widens. Continue alternating flowers and fir, then lower the outer row again. Seen from the side, the surface should curve down from the centre towards the edge.
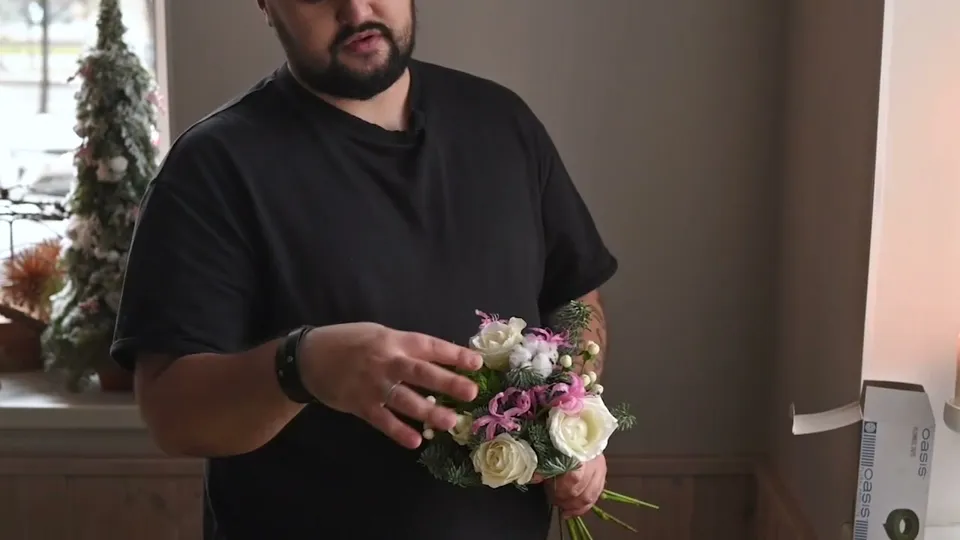
Check the colour as well as the outline. White flowers, pink flowers and berries should recur around the bouquet. If all the white is gathering on one side, turn the bouquet and place the next white element elsewhere. Small groups of dried lavender add a finer texture between the larger heads.
The aim here is an even distribution, without one strongly isolated focal group. That does not require an identical flower at every interval. Look for repeated colours and textures as you turn the bouquet, while keeping its side profile rounded.
Shorten an unusually long lower stem if it is getting in the way of your hand. Leave the final overall trim until the arrangement is tied.
Add the fir collar, then place the baubles
Use the reserved fir around the bottom edge of the flower heads. Let the foliage meet the outer flowers and continue the curve underneath them. Turn the bouquet to check the whole circumference. A collar that is full on one side and sparse on the other will interrupt the circle.
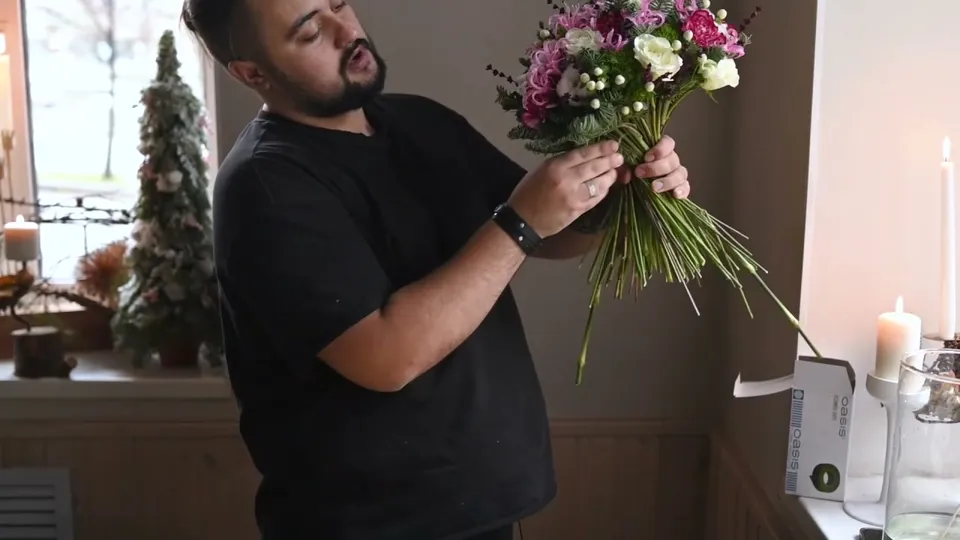
Now look for places where decorative apples or baubles would connect the colours. A pink apple cluster can sit beside green dianthus; a small bauble can bring a point of shine into a darker area. Slide each prepared handle into the existing spiral rather than forcing it straight through the bundle.
Keep the ornaments among the flowers. In this bouquet, three baubles supply the Christmas detail without covering the floral surface. Turn the work again before tying it, and adjust any ornament that projects beyond the outline you have built.
Tie and trim the stem bundle
Bind the bouquet at the holding point and knot the tie. Keep the spiral together while you turn the bouquet over for trimming. Gently gather the stem ends towards the centre, then cut across them at a common level.
The centre stems are then shortened by about 2 cm. When the gathered ends are released, the outer stems spread again. This finishing method allows the bouquet to stand on its cut ends for presentation.
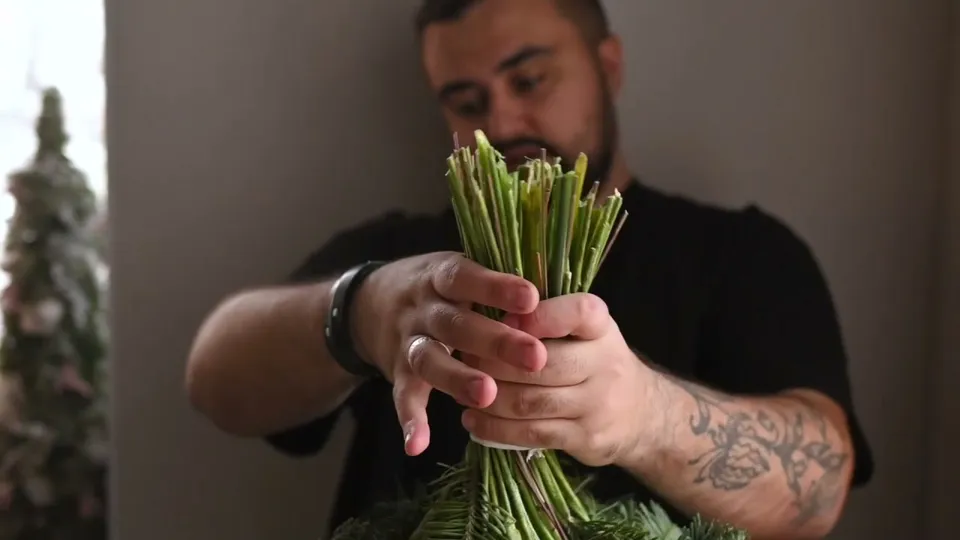
Return it upright on a level surface and check the result before letting go. The standing display shows the shape and finished stems; fresh flowers still need water. Choose a vase that supports the bouquet and lets the cut flower stems reach the water without crushing its fir collar.
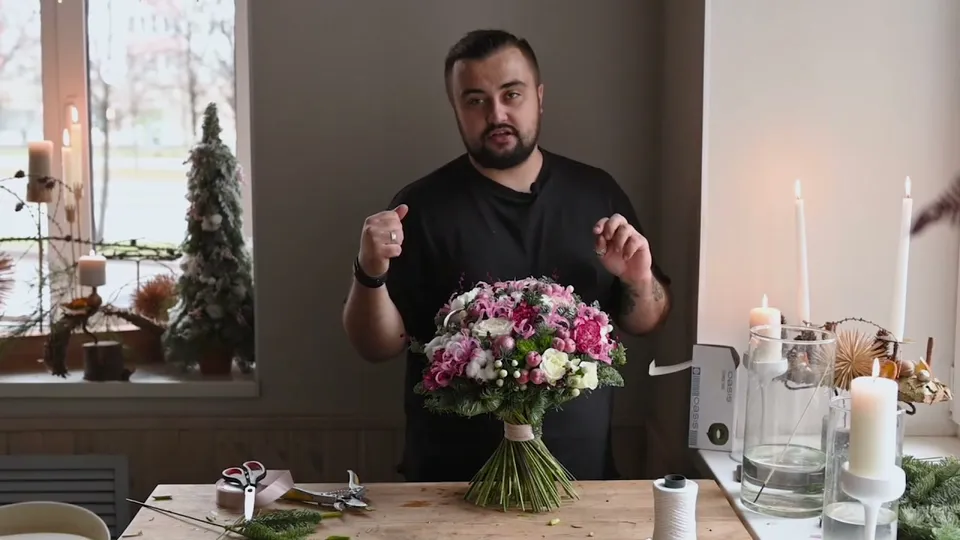
Put the fresh flowers in water
Place the bouquet in a clean vase with water once the presentation is finished. Remove foliage that would sit below the waterline, and use cut-flower food according to its directions. Check the water level regularly, refresh the water and re-cut the flower stems as needed. Keep the vase away from radiators and other heat sources.
The cotton, dried lavender and baubles are different materials from the fresh flowers. Their presence does not turn the bouquet into a dried arrangement or give every part the same lifespan. As the flowers fade, remove them rather than judging freshness by the ornaments and greenery alone.
Before giving the bouquet, look around it once more. The centre should lead smoothly down to the outer flowers, with the fir collar finishing the edge. Make sure the recipient has a suitable vase ready, so the flowers can go into water after the handover.
For a different winter project for your home or as a gift, browse Christmas and Winter Floristry.