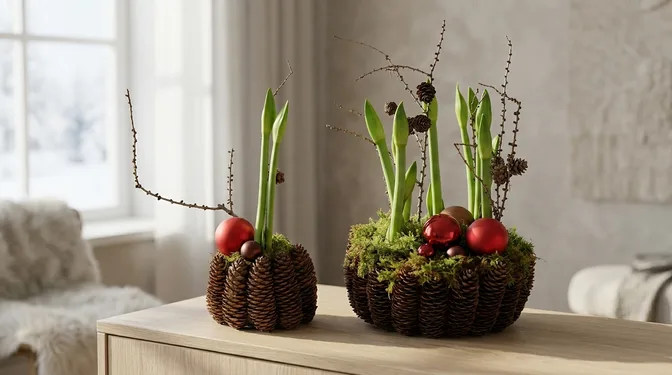
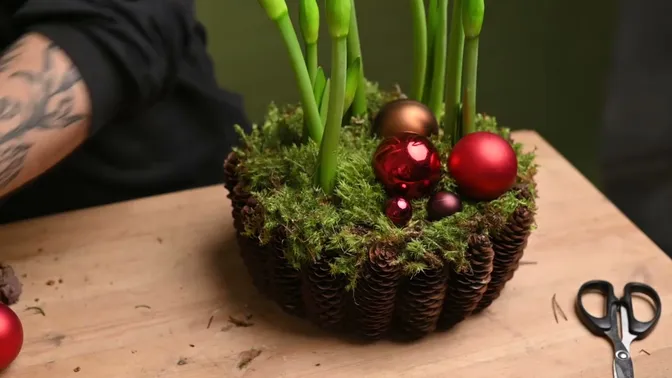
Long spruce-cone halves make a textured sleeve around a plain bowl. Above them, green amaryllis buds rise through moss, with red and bronze baubles gathered low beside the stems. Bare larch twigs continue the upright lines. A small pot and a broader bowl use the same materials, so they look like a pair even though their sizes differ.
These are living bulb arrangements to make for your home or give as gifts. The indoor plant commonly sold as amaryllis is Hippeastrum. Here, the plants are still in bud: the cones, moss and ornaments give the pots their Christmas character before the flowers open.
Choose the container and the plants together
Start with how the plants will fit and how you will water them. Use a stable container made for planting, with drainage holes and a saucer you can empty. Check that its material is suitable for moist potting mix. A decorative bowl that lacks drainage can instead hold a removable inner pot with holes. Try that pot in place before decorating the outside.
Lift the inner pot out for watering, let it drain, and empty any water left in the outer bowl before returning it. A layer of stones beneath the potting mix does not improve drainage or replace the need for holes.
The larger arrangement below groups five bulbs. That is the number for this bowl, rather than a target for every planter. A smaller pot can make a complete gift with one bulb. Choose a container that accommodates the roots and leaves room to work around the growing stems.
Gather these materials:
- Growing amaryllis plants in pots, plus a suitable planting container or removable inner pot and decorative bowl.
- Long spruce cones of similar length, enough to cover the outside wall.
- Potting mix for container plants and moss for a light decorative surface.
- Plastic baubles in red, bronze and a darker linking shade, in several sizes.
- Stiff floristry wire, a few bare larch sprigs, small decorative cones and natural twine.
- Pruning shears, wire cutters, scissors and a hot-glue gun for the outer cone covering.
The cone detail here uses spruce cones. Their long shape suits a vertical row around the bowl; choose pieces that reach from the lower edge to the rim without projecting below the base.
Split the spruce cones lengthwise
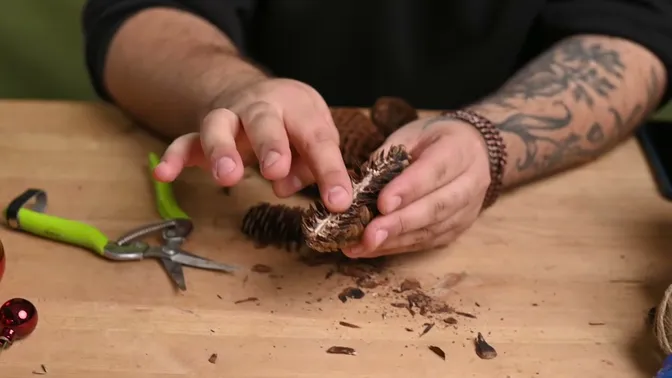
Cut each cone along its central axis with pruning shears, keeping your fingers clear of the blades. The aim is a half-cone with a flat inner face that can sit against the container. Ordinary scissors are not suitable for cutting the woody center.
Some cones will give two usable halves; others will give only one. Set aside the pieces with the cleanest outer shape, then try a few against the bowl. Similar lengths make the upper edge easier to arrange. The scales can overlap slightly where neighboring halves meet.
Cover the outside while keeping the base level
Test one cone half on the outside of the empty container. Apply hot glue along its flat inner face, press it against the wall and allow the glue to set. Check that the prepared surface holds the join before covering the whole bowl. Keep the glue on the decorative exterior, away from the plants and potting mix.
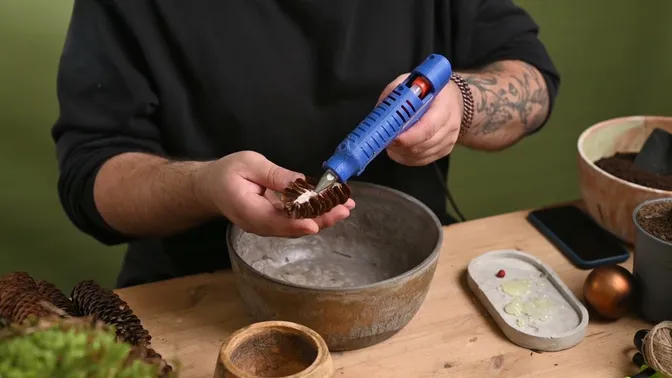
Stand the bowl on a flat surface as you position the pieces. Align their lower ends so they do not become uneven feet under the planter. Work around the wall, fitting one half close to the next and nesting the scales to reduce gaps. Check the rim as well as the base: the original container should recede behind the cones.
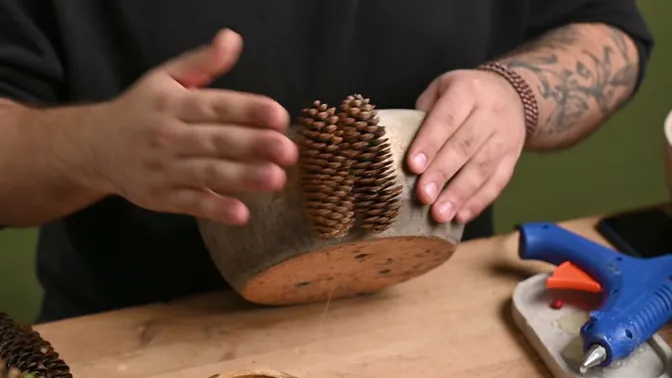
Let the joins set before adding the plants. The twine comes later as a visible finish; it does not replace a sound attachment between the cones and the container.
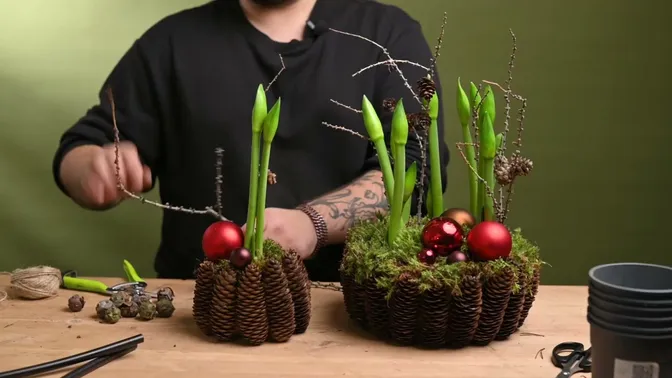
See how the cone halves meet around the curved wall in the amaryllis planter video (video details). Follow the cutting and gluing before you arrange your own pieces.
Set the bulbs with their upper parts exposed
For a home version, retaining the plants in a removable pot makes watering and later changes simpler. If you plant several bulbs together, use a container with drainage holes and fresh potting mix. Ease each root ball out of its old pot, supporting it from below rather than pulling on the flower stalks.
Set the bulbs upright and settle the mix around their roots, leaving the upper two-thirds of each bulb above the surface. Keep that exposed area clear when you add the moss. The narrow neck where the stalks emerge should remain visible.
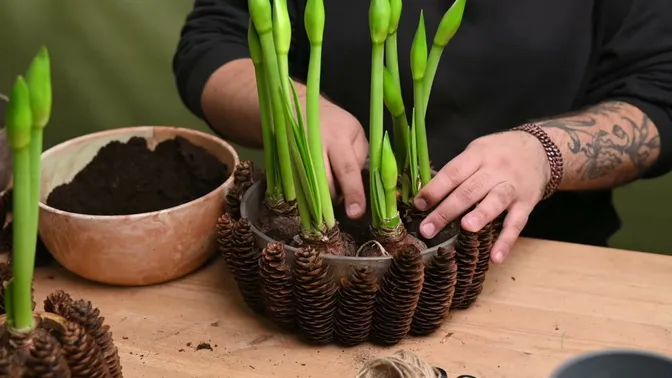
Place the plants before arranging the baubles. Look at the spaces between the stalks and decide where a low ornament group can sit without crowding the new growth.
Add moss around the planting
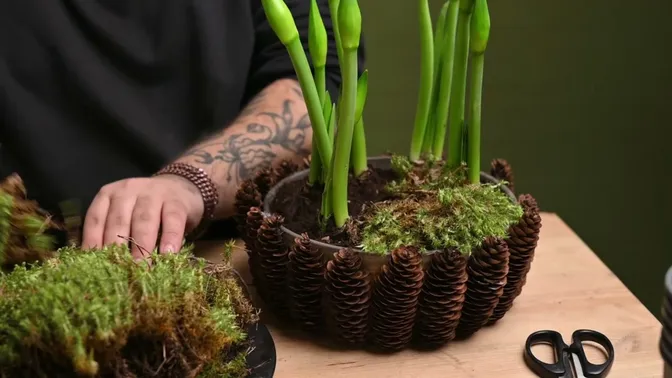
Sort through the moss and remove loose twigs and debris. Use broad, intact pieces where possible, turning the green surface upward. Lay them between the bulbs and toward the rim to soften the edge of the container.
Keep the bulb necks and exposed upper parts clear. Leave a small piece of moss easy to lift so you can check the potting mix beneath it. The moss finishes the appearance of the pot; watering still depends on the plant and its growing medium.
Small U-shaped pins bent from stiff wire can hold the moss in place. Choose clear gaps in the planting and keep the pins away from bulbs, roots and stalks. If the planting leaves no clear place for a pin, omit it rather than forcing it into the root ball.
Make wire stems for the baubles
Use plastic baubles for this method. Wrapping stiff wire around the neck of a glass ornament can break it in your hands.
Cut a 40 cm length of floristry wire in half to make two 20 cm pieces. These are the lengths used for the bauble stems in this pair of planters. Wrap the middle of one piece a couple of times around the neck below the bauble's cap. Bring the remaining ends together to form a stem that can hold the ornament among the decorations.
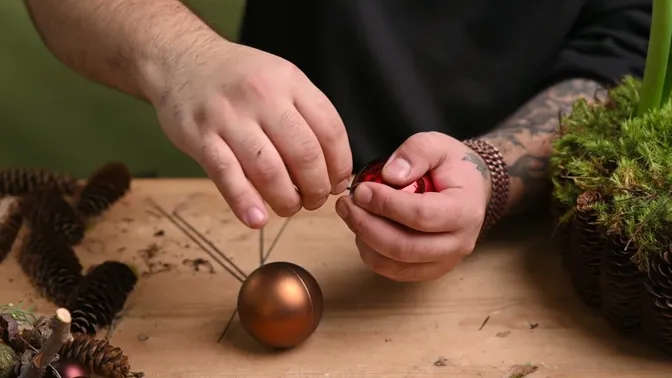
Place the larger baubles first, then add medium and small ones alongside them. Keep them in a group rather than spreading them evenly across the whole surface. Here, red anticipates the chosen flowers, bronze relates to the cones, and the smaller dark ornaments connect the two colors.
Insert the wire stems only where there is room between the bulbs. Keep them clear of the plants, and leave access for watering. In the small pot, one large bauble and one smaller one can carry the same color idea without filling every gap.
Continue the stems with bare twigs
Try a few bare larch sprigs beside the amaryllis stalks. Their fine side branches add width to the upright shape without making a dense screen around the buds. Use shorter pieces for the small pot and let the larger bowl carry the taller lines.
Place the sprigs in clear spaces in the potting mix, away from bulbs and roots. Keep the tips out of the buds' path as they open. A few small cypress cones on the moss repeat the texture of the outside covering at a smaller scale.
Tie the pair together with twine
Fold several lengths of natural twine together and take them around the outside of the cone covering. Tie a small bow, then trim the loose ends. Repeat the finish on the second planter so that the two sizes share another detail.
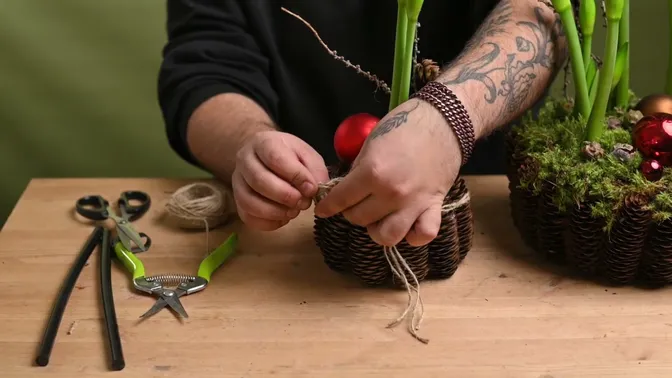
Check the pieces from the angle at which they will be seen. The small pot needs fewer ornaments, but it can use the same color and texture as the larger one. Keep artificial snow and other loose decorative products away from the bulbs, potting mix and growing shoots. Their suitability depends on the product, so the natural cones, moss and twine can provide the finish on their own.
Care for the plant beyond the Christmas display
Choose a bright position with filtered light. Water lightly until new leaves develop, then water more regularly while avoiding water collecting in the saucer. Check beneath the moss instead of watering to a fixed calendar. Once the flowers open, a cooler position can help them last longer. Large-flowered plants may need a suitable support stake; the decorative twigs do not replace it.
After flowering, remove the faded flowers. Leave a green flower stalk in place until it turns yellow, and keep the leaves growing in bright light. The decorative cones can stay with the outer bowl when the plant moves to a simpler setting.
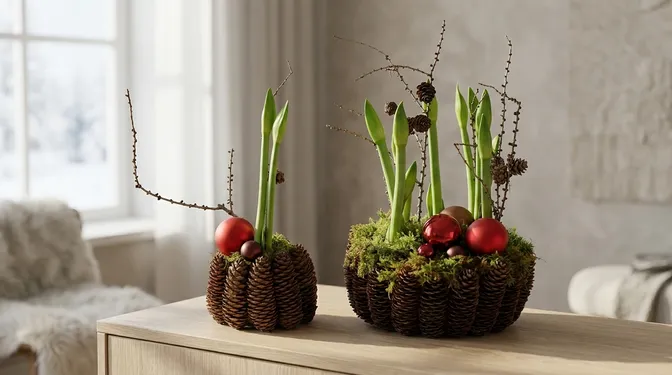
For a gift, show the recipient how to reach the planting pot, drain excess water and lift the moss for a moisture check. Give the plant enough space for its flowers to open. The small arrangement can stand on its own; the larger one makes a companion piece when you want to keep the same materials in your own home.
If you would like to make the pair, continue with Christmas Amaryllis Planters with Pinecone Cladding (video details). The video takes you through the cone covering, planting and decorative finish.