Choose a candleholder if you want to build a separate object with a base and a support. Choose candle decoration if you want to change the outline of an already finished candle, with wings, a side panel of leaves, or a birch-bark extension. These projects use finished candles; they do not make wax bodies or wicks.
Picture the finished object in its intended place. A wooden holder shows its block and slender stems, while a woven bowl has a wide surrounding rim. Paired wings shape the angel candle; the birch-bark treatment emphasizes height and surface. Keep the botanical details as part of an unlit display. Do not treat the wick as a reason to light the candle among those decorations.
Decide what you want to build
Your aim | Form | Where the decoration sits |
|---|---|---|
Raise slender candles above wood | Block with woven cups on wire stems | A small suspended detail beside the holders |
Create an open pine-needle form around one candle | Stump-based holder with wire framework | Pine needles pass through the three-dimensional wirework |
Make a central object with a wide bowl | Woven wreath bowl | Dried flowers surround the central candle cup |
Change the side outline of a finished candle | Angel candle | Paired wire wings with greenery and small details |
Make a finished candle appear taller | Birch-bark extension | Cladding around the lower part and gold wirework above |
Add a dry botanical panel | Candle with a side framework | Cattail leaves, lavender, and mimosa on the wire frame |
Compare width as well as height. Wings extend to the sides, the pine-needle volume surrounds the candle, and the bowl occupies space all around it. Decide which sides of the finished object will be visible before starting.
Three candleholders with different structures
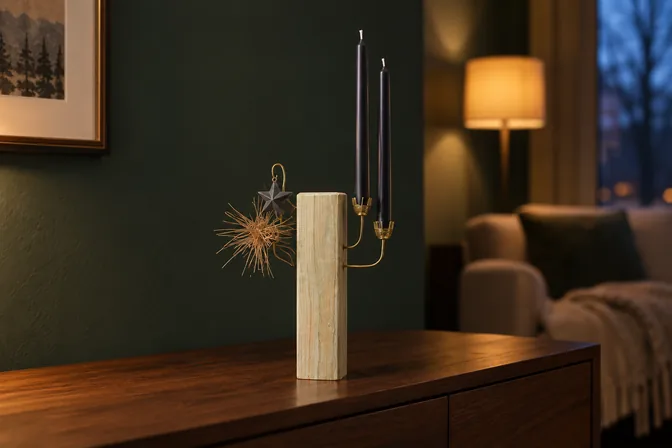
A wooden block with raised cups
Each slender candle in the wooden holder sits in its own woven wire cup. A curved stem carries the cup to one side and fits into a drilled position in the block. The cups stand at different heights; a small suspended detail of wire, pine needles, and a star balances them on the other side.
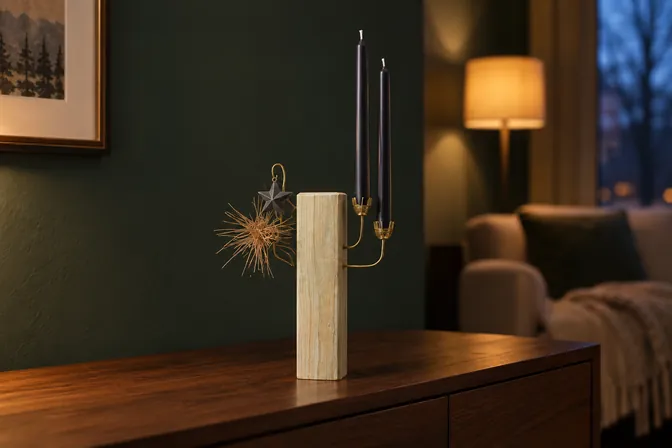
This project involves weaving small forms and joining them to wood. The cup is fitted to the particular candle while it is woven, so its shape matches the candle's diameter. The finished candle remains a separate piece inside the cup. Much of the work happens in those small holders and their connections to the base.
An open pine-needle form on a stump
The floating-look holder has a wooden stump supporting a raised candle and the wire structure around it. Fine wire forms an open three-dimensional mesh. Pine needles pass through that structure in different directions and at different levels, with small larch cones and birch bark near the top.
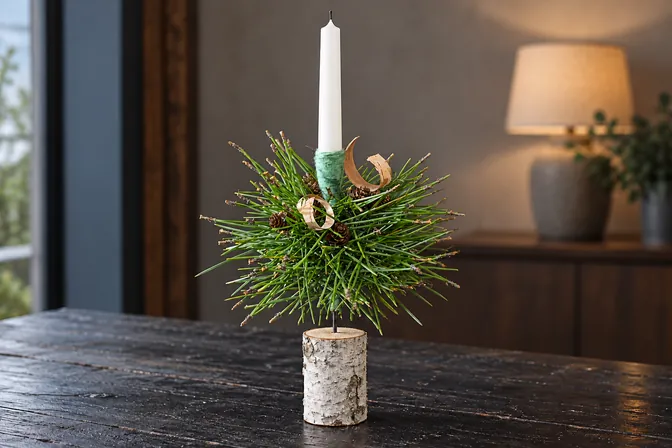
Consider it if you like a spiky, loose texture. There is no continuous bowl wall: the needles and the gaps between them create the volume. The wire structure comes before the greenery. The wooden support remains visible beneath the lighter upper form.
A woven bowl edged with dried flowers
The wreath bowl has a wire foot, stem, central candle cup, and wide outer bowl. Dried flowers and colored eucalyptus decorate the rim, leaving parts of the woven metal pattern visible. The candle occupies the center of a separate tabletop object.
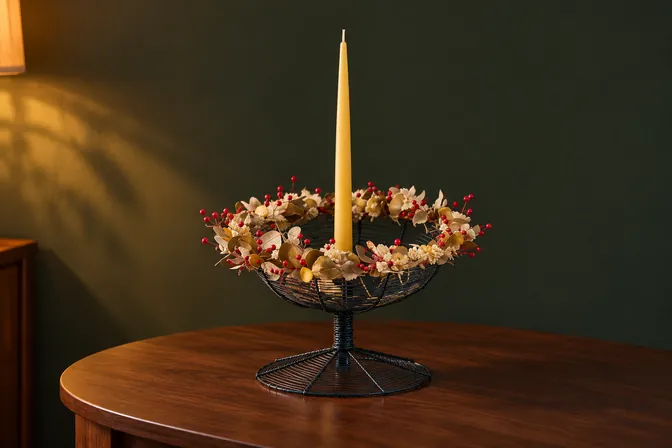
Choose the bowl if you enjoy spending time on a woven form. You will build the full volume before adding the plants. The repeated handwork makes this a more involved construction than decorating an existing candle. Its shape belongs on a table as a three-dimensional bowl, rather than as a flat wall wreath.
Three ways to change a finished candle
An angel with evergreen wings
The angel candle starts with a pair of matching S-shaped wire frames. Short pieces of greenery, beads, rose hips, cinnamon, and small pieces of dried lime decorate the frames. The finished wings attach on opposite sides of the candle.
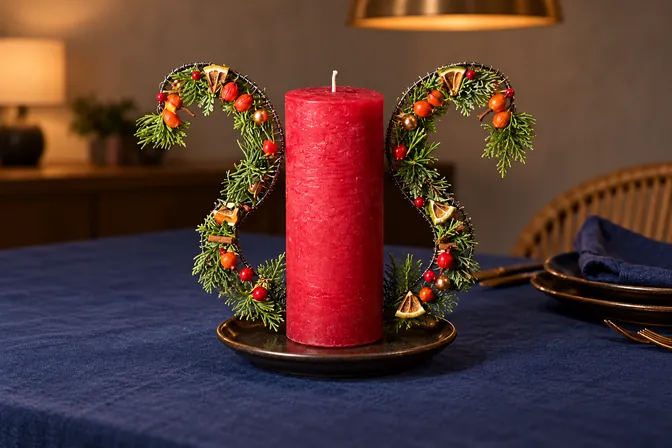
Choose the design for its expressive side outline. Compare the bare frames together before decorating them: their size and curves need to work with each other and with the candle. Small accents follow the curved supports. The candle itself is already made before the wings are added.
Birch bark and a gold vertical detail
The birch-bark treatment makes a finished candle taller with a separate lower extension made from polystyrene. That extension joins the candle, receives a masking-tape covering, and is clad in small pieces of birch bark. Alternating fragments change the direction of the natural surface pattern.
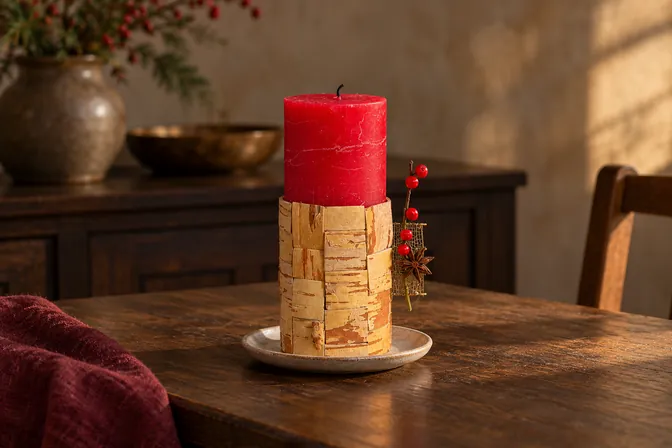
A gold-colored wire panel near the upper part of the bark treatment carries a berry branch and star anise. The cladding provides much of the visual effect, leaving smaller decorations as accents. The tall object is not wax throughout: its lower part is a decorative extension. The extension changes the surface and outline of the existing candle.
A side panel of dry leaves
In the lavender candle, a wire frame extends from the side of the finished body. Fine decorative wire covers that frame, then pieces of dried cattail leaf cover both sides. Small groups of lavender and mimosa sit above the middle of the resulting panel.
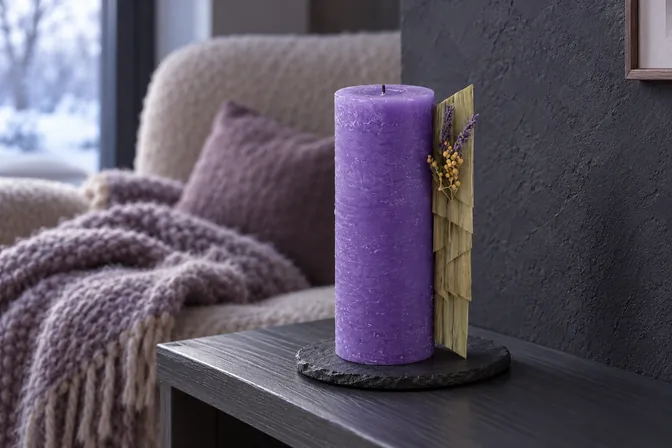
This changes the candle's side profile rather than adding the bark extension's height. The work combines layered, flat leaves with small flower clusters. Look at both sides as you arrange it, especially if the finished candle will be seen from different positions. The botanical panel becomes the main visible detail on an existing candle.
Choose the material that will define the form
For a candleholder, begin with the base and cup. The wooden block suits someone interested in wood and small woven holders. The stump project builds a loose pine-needle volume. The wide bowl offers more extensive wire weaving followed by dried-flower decoration.
For decoration on a finished candle, begin with the outline you want: paired wings, a tall bark surface, or a side panel of leaves. You do not need to fill every space with ornaments. Keep the bark's pattern visible, preserve the curve of the wings, and leave gaps in the pine-needle form. That leaves the main texture visible among the smaller decorations.
Leave botanically decorated candles as unlit interior objects. If you want a light effect, you could consider a flameless candle, checking its size and placement separately; the original constructions do not establish automatic compatibility. For other winter objects to make for the home, explore the Christmas and winter floristry collection.